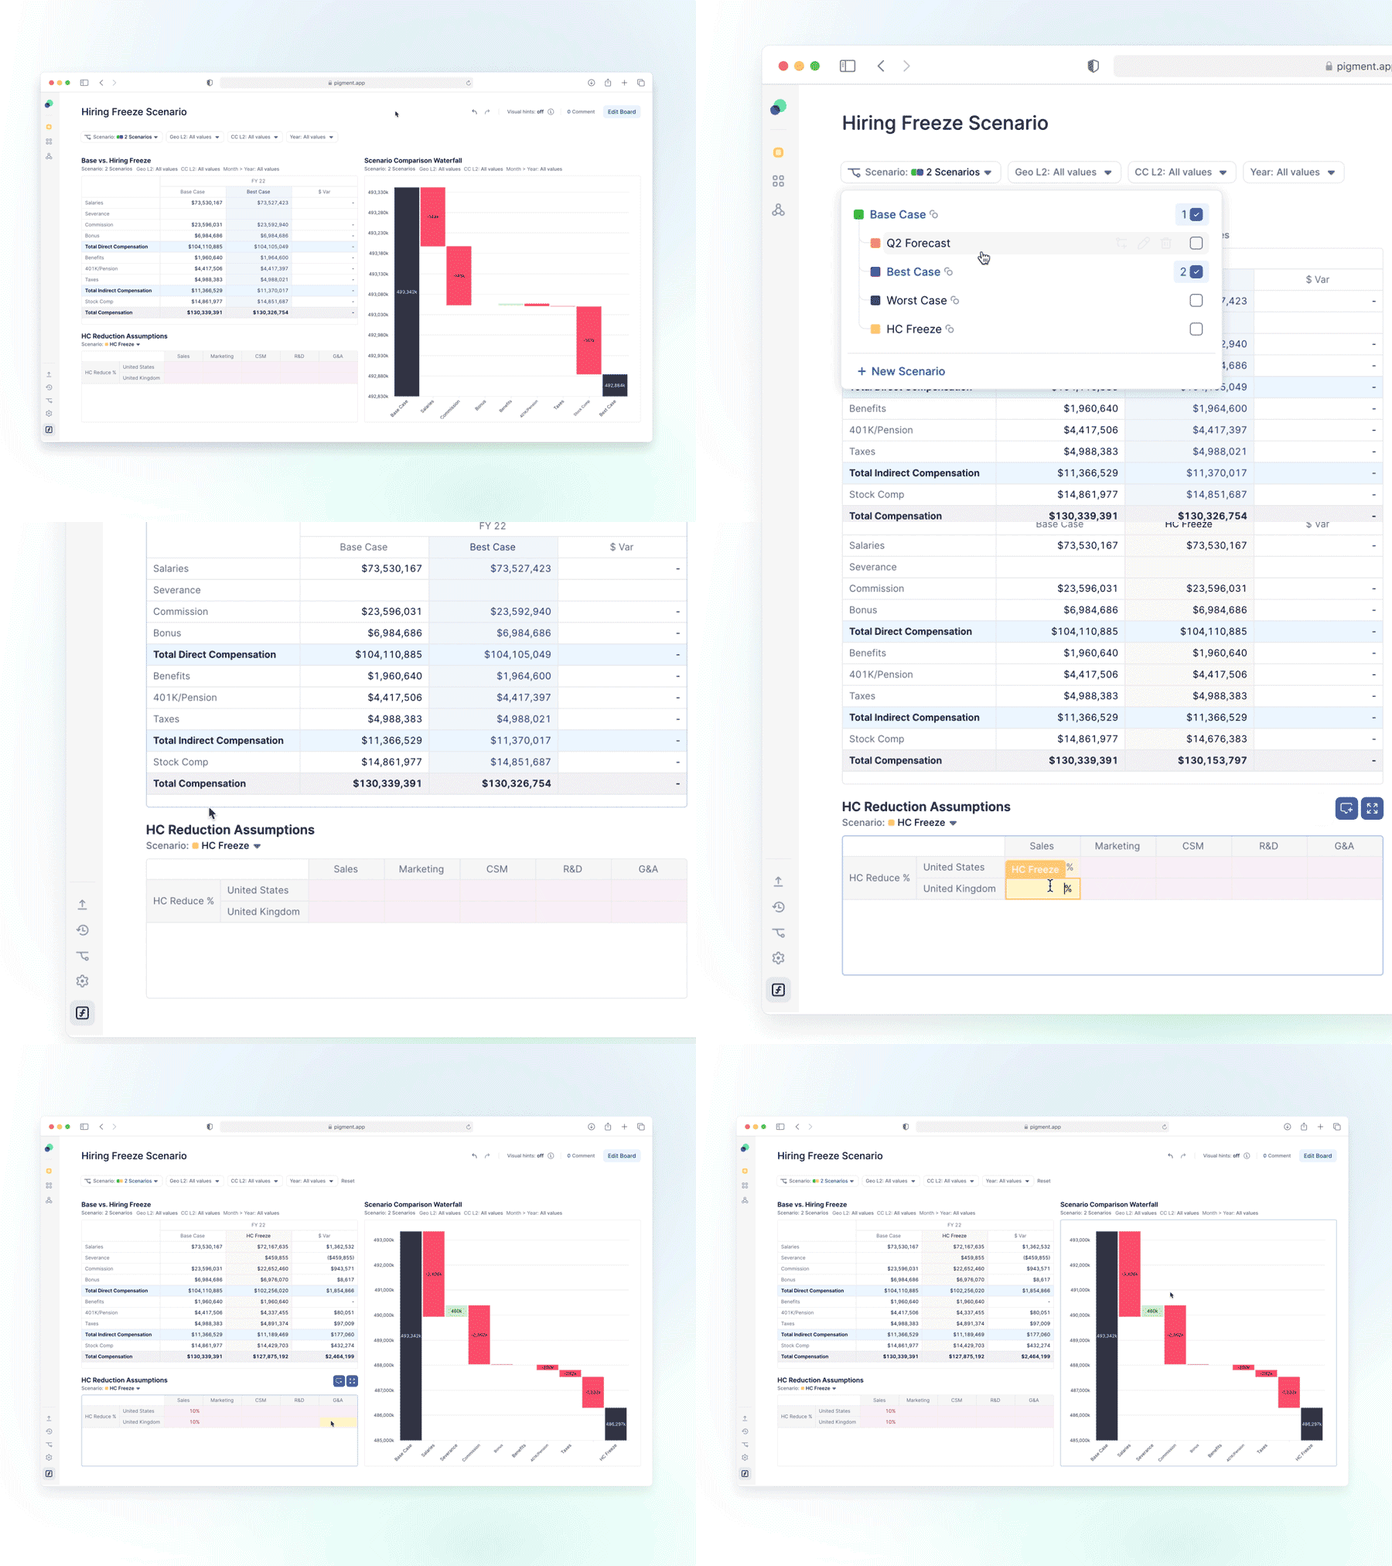
Throughout your planning process, you might want to try out multiple plans by changing inputs or calculations to determine which one is best. There might be instances where you’d like to compare different planning scenarios, these can be company-wide, department-wide, or even just one individual process or Application. You might want to try out “What-if” planning and be able to compare results. This article will introduce you to Scenarios and show you how they can help with your planning process.
Table of Contents
What are Scenarios for?
Scenarios let you set up different versions of your data inputs or formulas to create different plans and compare them. Whether you want to set different assumptions or test different formulas on Metrics, scenarios allow you to try out multiple versions to identify the optimal solution.
The structure of the model will remain consistent across scenarios allowing you to easily identify the changes made in data and formulas. This means the Blocks and their associated Dimensions and Data types will be the same, allowing you to focus on inputs and formulas. There are also elements of data visualization, such as the Boards and the Views that will remain consistent with scenarios. However, you can visualize multiple scenarios side-by-side in Charts and Tables, to easily compare them.
Some things to keep in mind with Scenarios:
- you can't perform calculations across scenarios. For example, in Scenario A you can't sum the values of Scenario B, the same applies to referencing another scenario’s data through formulas.
- Lists, Transaction lists, and Dimensions lists, must be consistent across scenarios, meaning you can’t have one list in Scenario A and another in Scenario B
What are the types of Scenarios?
When creating a new Scenario is very important to select the right type of Scenario. As once you have started to work on a particular Scenario you can’t change its type.
There are 2 types of Scenarios:
- Shared Scenarios: have the ability to be used across different Applications. By default, if you have the relevant permissions new scenarios are created as Shared Scenarios by default, if you prefer to create a local one you just have to disable the “Shared Scenario” option in the Scenario creation form. Keep in mind, if your Application is using or will be using Shared Blocks from other Applications and you plan to change assumptions on these Blocks, you need a Shared Scenario.
- Local Scenarios: the Scenario will be created only in your Application and won’t be visible elsewhere. Data in Local Scenarios will never be shared with other Applications via Shared Blocks. Shared Blocks being used in the Local Scenario are the ones coming from the closest Shared Scenario.
Note: Scenarios can’t be converted from Local to Shared and vice versa. You must also be a Workspace Administrator in order to create a Shared Scenario.
How do Scenarios work with each other?
Once activated, there will be a Default Scenario, this Scenario will inherit all the existing data inputs and formulas. When creating any new Scenario, you get to define a Scenario to be the Initial source of data. The new Scenario will take all of the existing data and formulas from the Source Scenario.
How do Scenarios work with Access Rights and Permissions?
By default, those with Admin Permissions will be able to create and delete Scenarios. Depending on your security configurations, you will need to adjust permissions for users to work with scenarios.
There are 2 permissions related to Scenarios:
- Create Scenario: this allows the user to activate and deactivate the Scenario feature from Scenario Tab, to create new Scenarios and set them as Read Only.
- Delete Scenario: allows the user to delete existing Scenarios.
All Scenarios are public, which means that everyone who has access to certain data in an Application will be able to see all Scenarios for that data. Scenarios won’t impact any existing Access Rights set up.
For example, if a user’s Access Rights only allows them to write on UK data, they will continue to only be able to write on UK data, but across all scenarios of UK data.
Currently there isn’t the ability to apply different Access Rights setups per scenario. However it’s possible to limit the ability for all users to be able to adjust data in a Scenario by placing the Scenario into Read Only.
This will prevent all users to manually enter data and import on that specific Scenario. Please note that it is still possible to change formulas in this Scenario so data can still evolve.
Only users with Create Scenario Permission can set a Scenario into Read only mode by selecting the “Prevent inputs” icon in the Scenario Selector dropdown.
How to activate the Scenarios feature?
Scenarios are activated at the application level. You can access the Scenario management page by clicking on the Scenarios tab located at the bottom of the Sidebar. Only Workspace Admins have visibility on the Scenario tab and are allowed to activate it on a specific Application.
Once activated, the following new elements will appear on the application.
-
A centralized Scenario management page to view, add, edit and delete scenarios
-
A Scenario selector on Boards, Formulas, Tables and Metrics to switch between Scenarios.
-
A Compare Scenarios functionality within Boards and Views that allows for quick selection and comparisons.
-
A Default Scenario that will inherit all current data and formulas


