


This article explains how to connect Personio with Pigment to retrieve custom report results into a Pigment block.
Table of Contents
As with all other native Pigment integrations, you’ll first need to configure a Connection in the integration Library page. Once configured, this connection can be used by any Application that is authorized as a data source. These authorized Apps are defined during the ‘Import Data’ configuration step. Now, let’s see how to configure and use this native integration!
Prerequisites
You need to be a Pigment Workspace Admin to be allowed to configure the connector.
Collecting the Personio API secrets to set up the connection
To communicate with your Personio account, Pigment needs some credentials, which need to be generated on Personio side. (cf. Personio Doc)
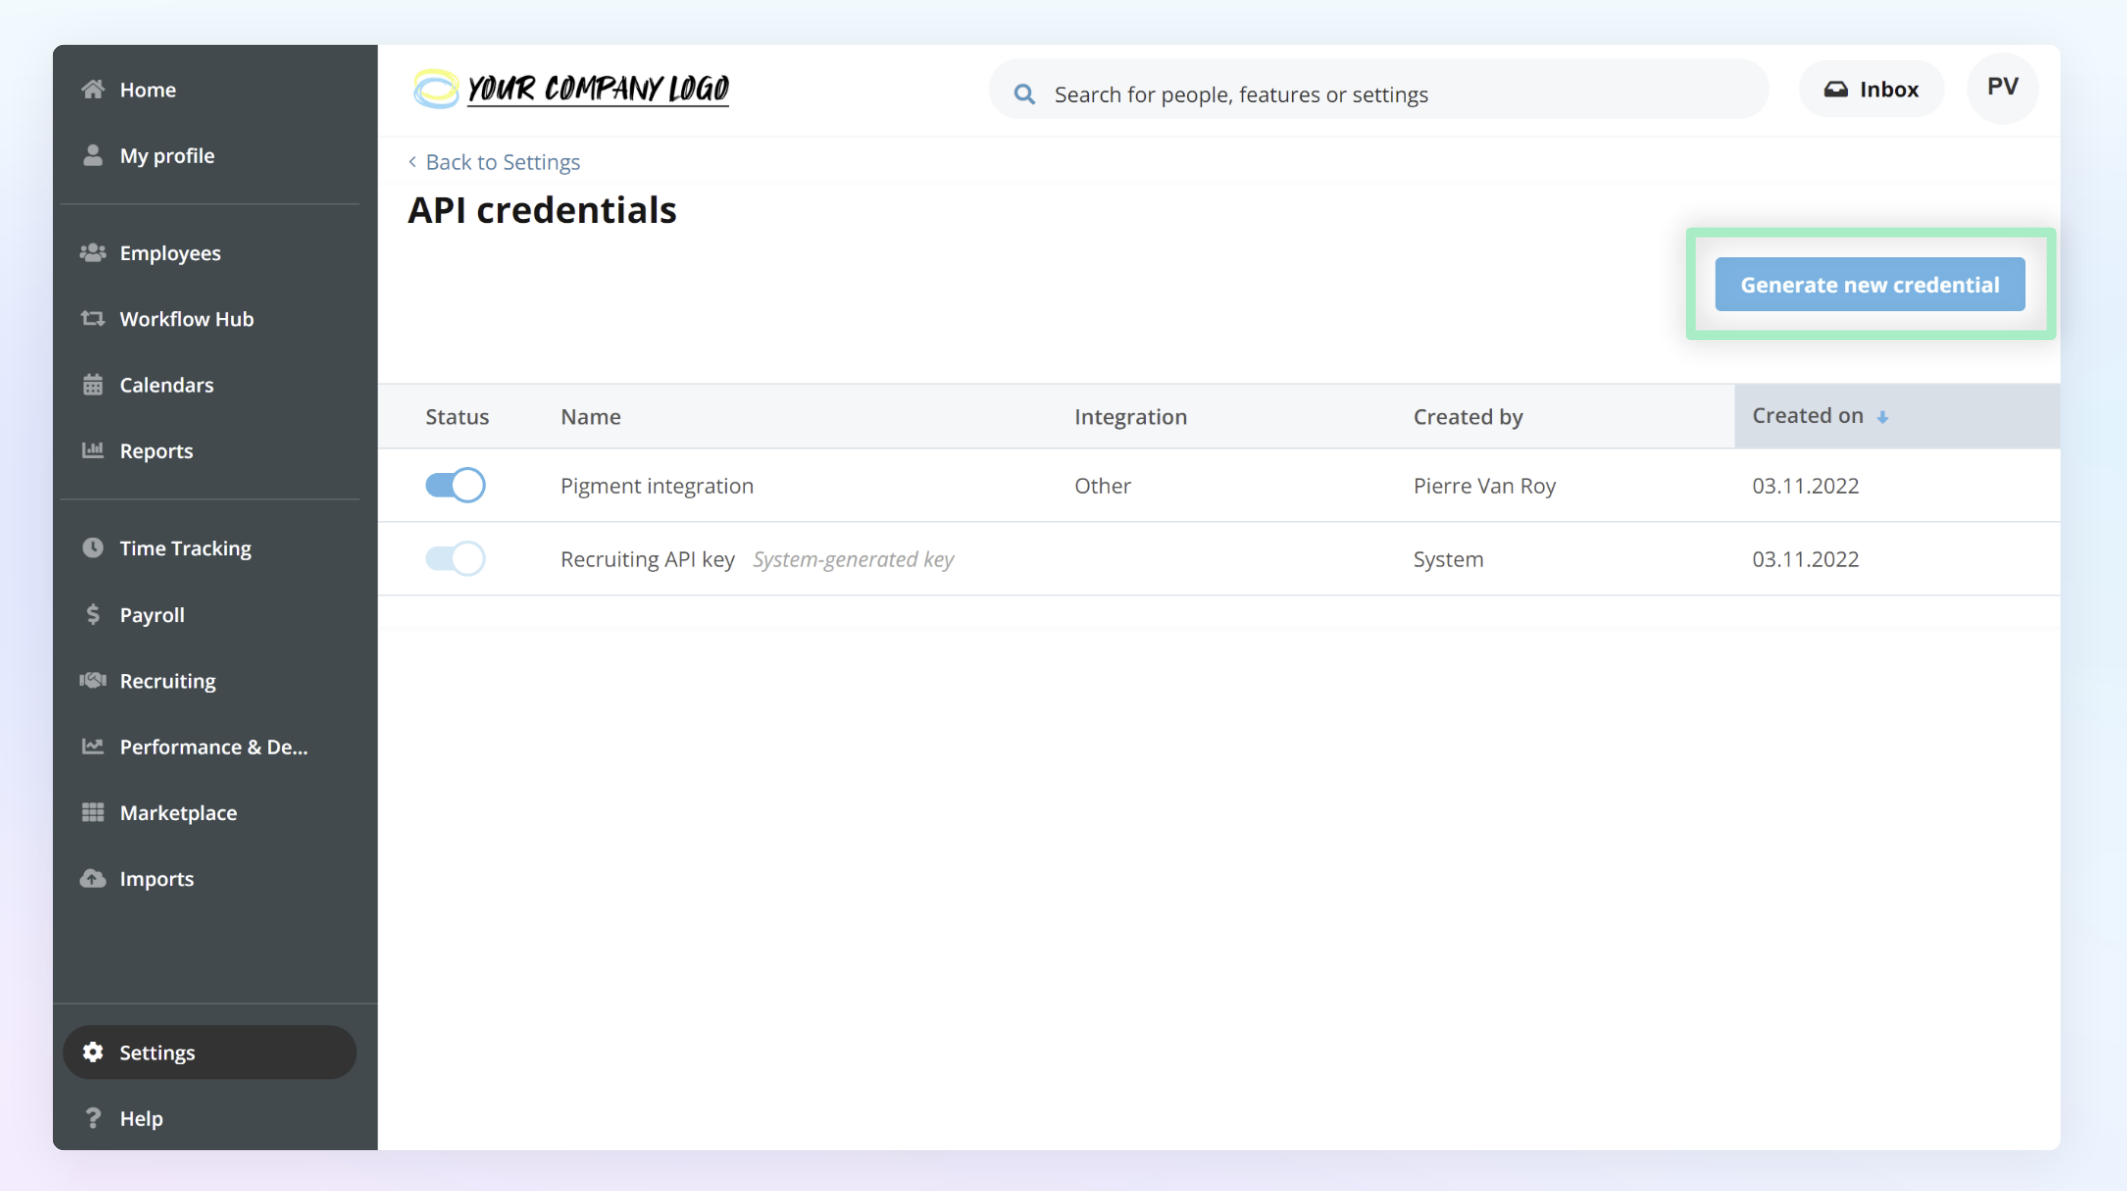
Step 1. From within Personio, go in Settings > Integrations > API Credentials. Next click on the Generate new credential.
| Step 2. Fill the following fields:
Step 3. Click on Generate new credential. Step 4. Copy the Client ID and Secret generated. Those will be needed in the next step. | 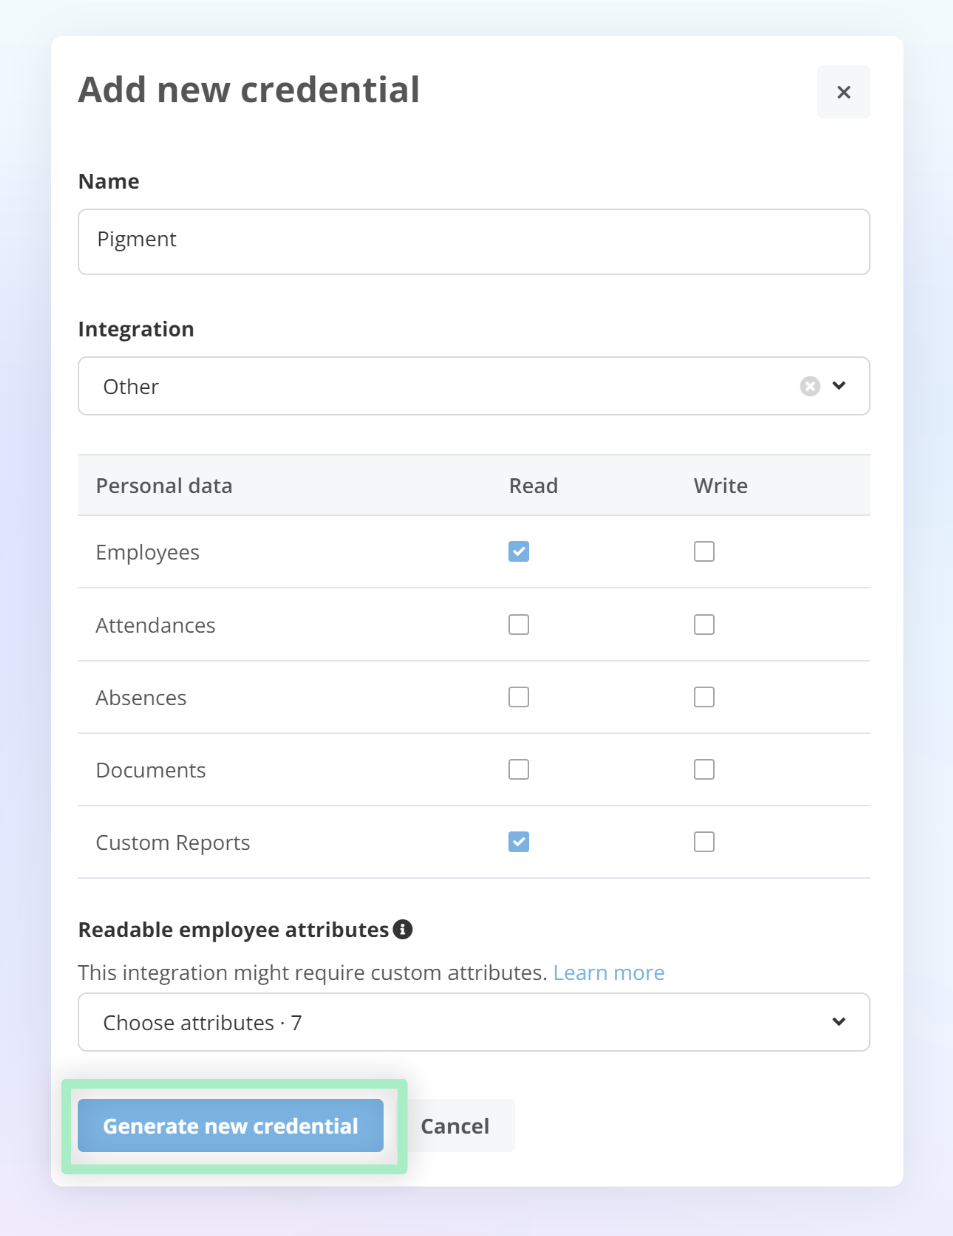
|
Copy the Client ID and Secret generated. Those will be needed in the next step.
Setting up the Personio Connector
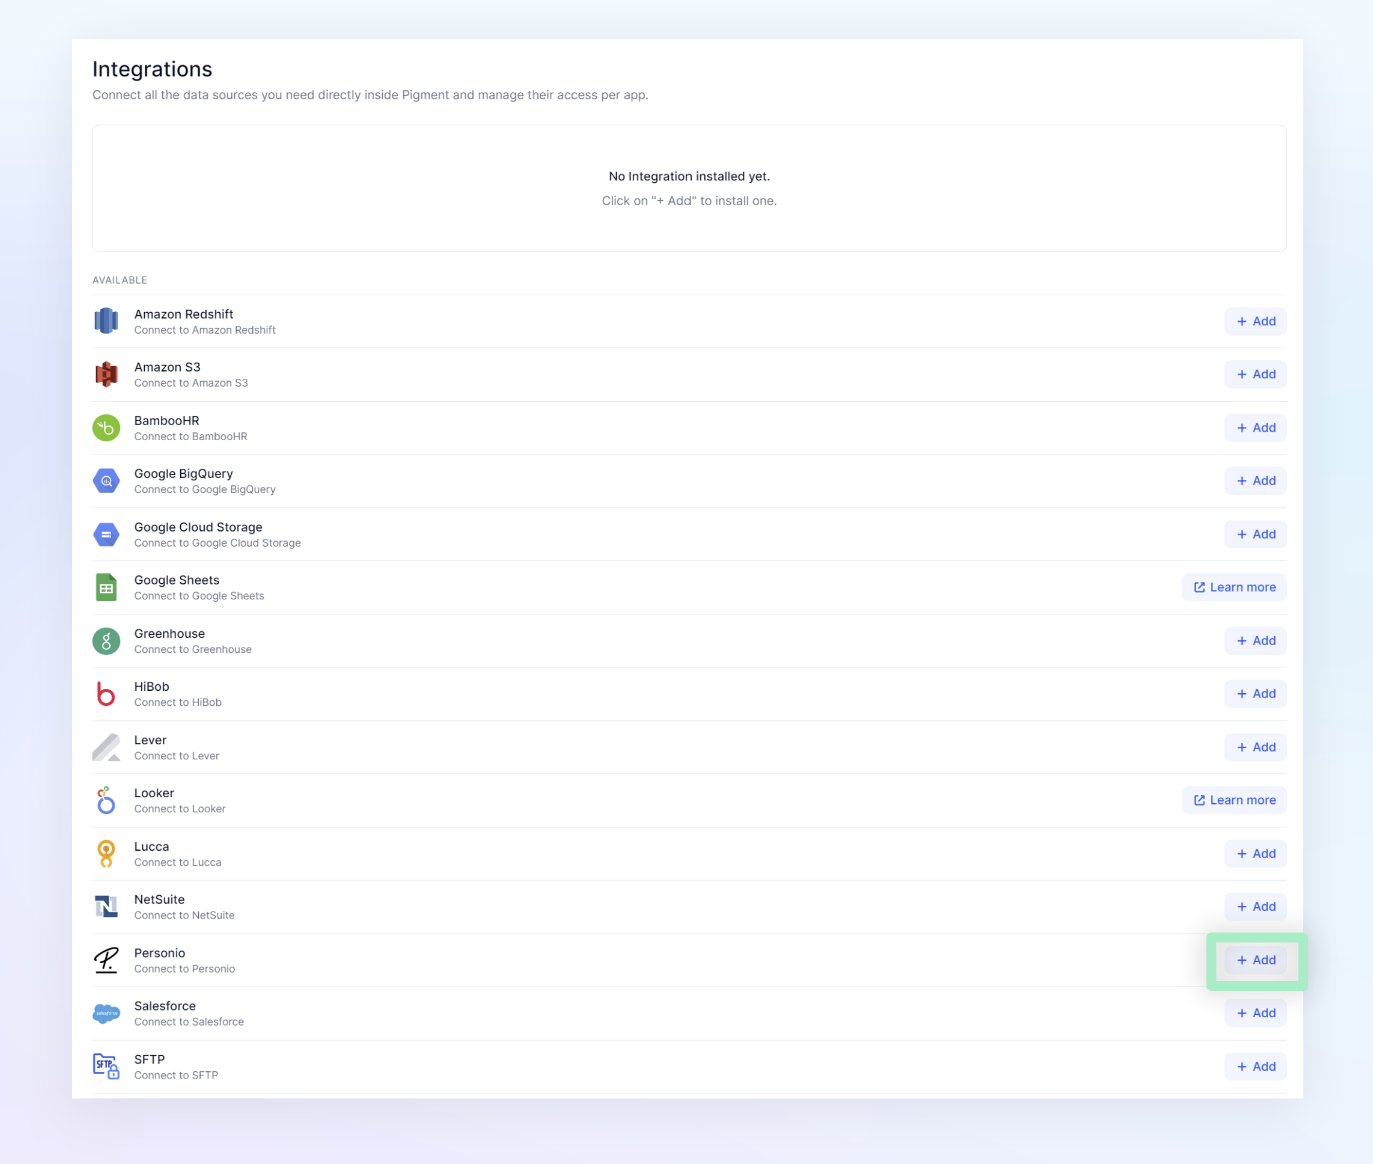
Within Pigment, navigate to the Integration page from your Workspace homepage, and click on “+ Add” on the Personio integration.
Important Note
You need to be a Pigment Workspace Admin to be allowed to configure the connector.
| Click on Setup a Connection and then fill in the following fields:
Click on Setup to finish the setup! | 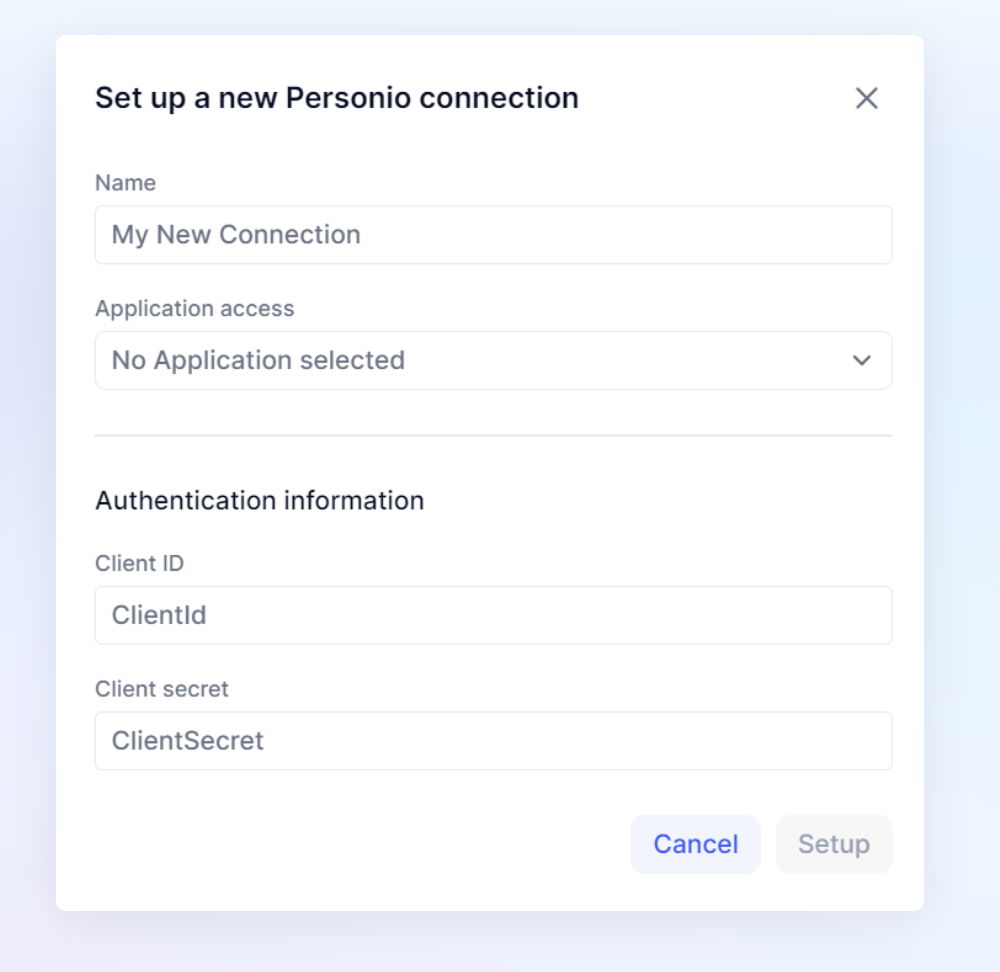
|
Loading data into Pigment
Once the Personio Connection is configured, open an Application that the connection is available on and open the “Import Data” interface for the object you want to import data into. For example, if you were importing data into a Transactions, you would open up list and then select Import and Download and then Import.
Instead of “Upload file”, select the Integration option. From here, select the Personio Connection you just configured.
Note
If you do not see the connection, navigate back to Integrations page, and verify that Application is on the Application Access list.
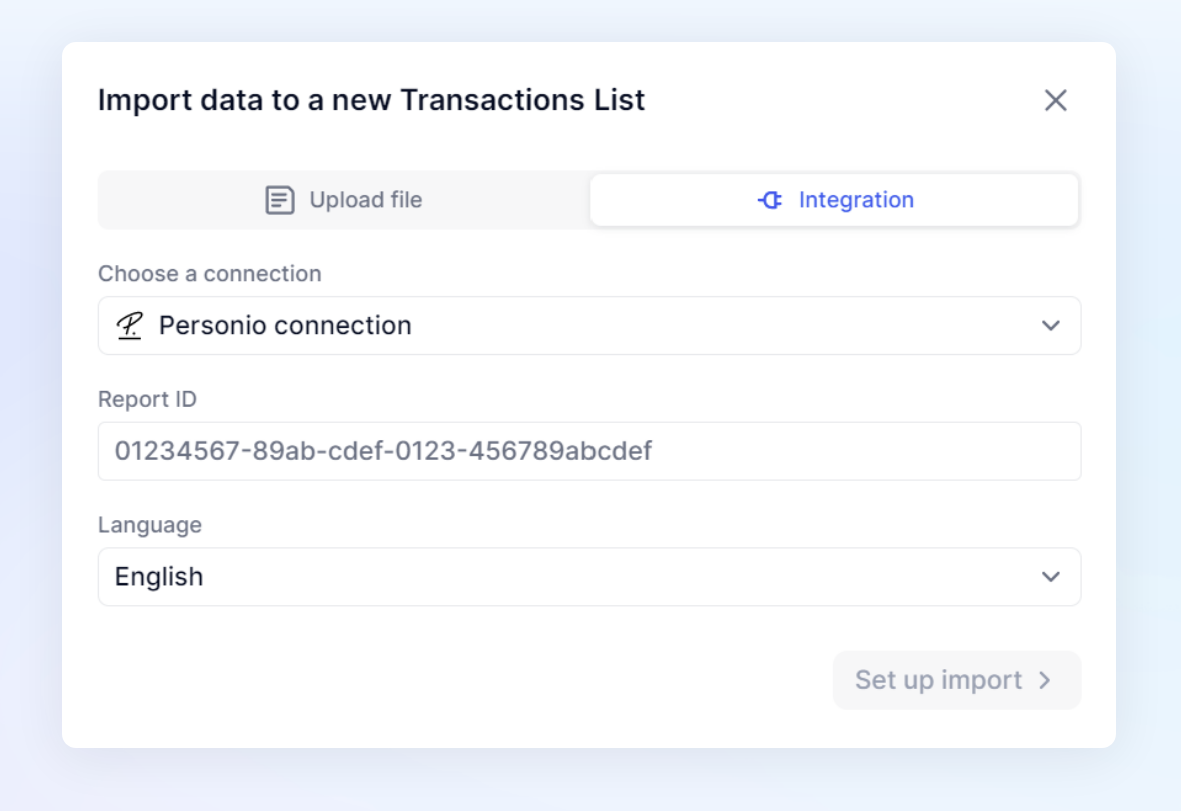
The Personio connector allows you to load any “Point in Time” custom report data into Pigment.
“Timeframe” and “Historical data” reports are not supported yet.
To do so, you need to fill-in the Report ID you want to load. To find this report Id, just open the board in Personio and copy the last part of the URL. For example, if the board url is https://mycompagny.personio.de/custom-reports/6f976df8-af49-45c4-b10c-3336a5bd87b4 the Report id is 6f976df8-af49-45c4-b10c-3336a5bd87b4 .
Select your prefered Language and click on Set up import.
The data should load in Pigment within a few seconds!