


Table of Contents
Summary
Mulesoft is a leading ETL provider that allows users to extract and load data from multiple sources into and from services such as Pigment. The guide below outlines how you can implement Pigment API calls into Mulesoft using their default HTTP module.
Use Cases
You can use the Pigment connection in Mulesoft to:
- Import data from sources such as an ERP or HR system to Pigment for analysis.
Example: Export revenue data from SAP for analysis and forecasting into Pigment. - Export data from Pigment back into other sources for reporting and data parity.
Example: Return completed hiring approvals into Workday and create a hiring record.
Obtaining Your API Information
In order to use Pigment within your Mule Flows, you will need to obtain the following information:
For imports:
- An import API Key
- A configuration ID
Detailed steps on how to obtain this information is available here.
For exports:
- An export API key
- An application ID
- A view ID
Detailed steps on how to obtain this information is available here.
Using The Sample File
Pigment provides a sample JAR file available here.
Use this as a starting point for your Mulesoft workflows, or to gain an understanding of how to set up the request connector with Pigment’s API.
Use of the JAR file is completely optional and we have included setup instructions below should you wish to set up a Flow without it.
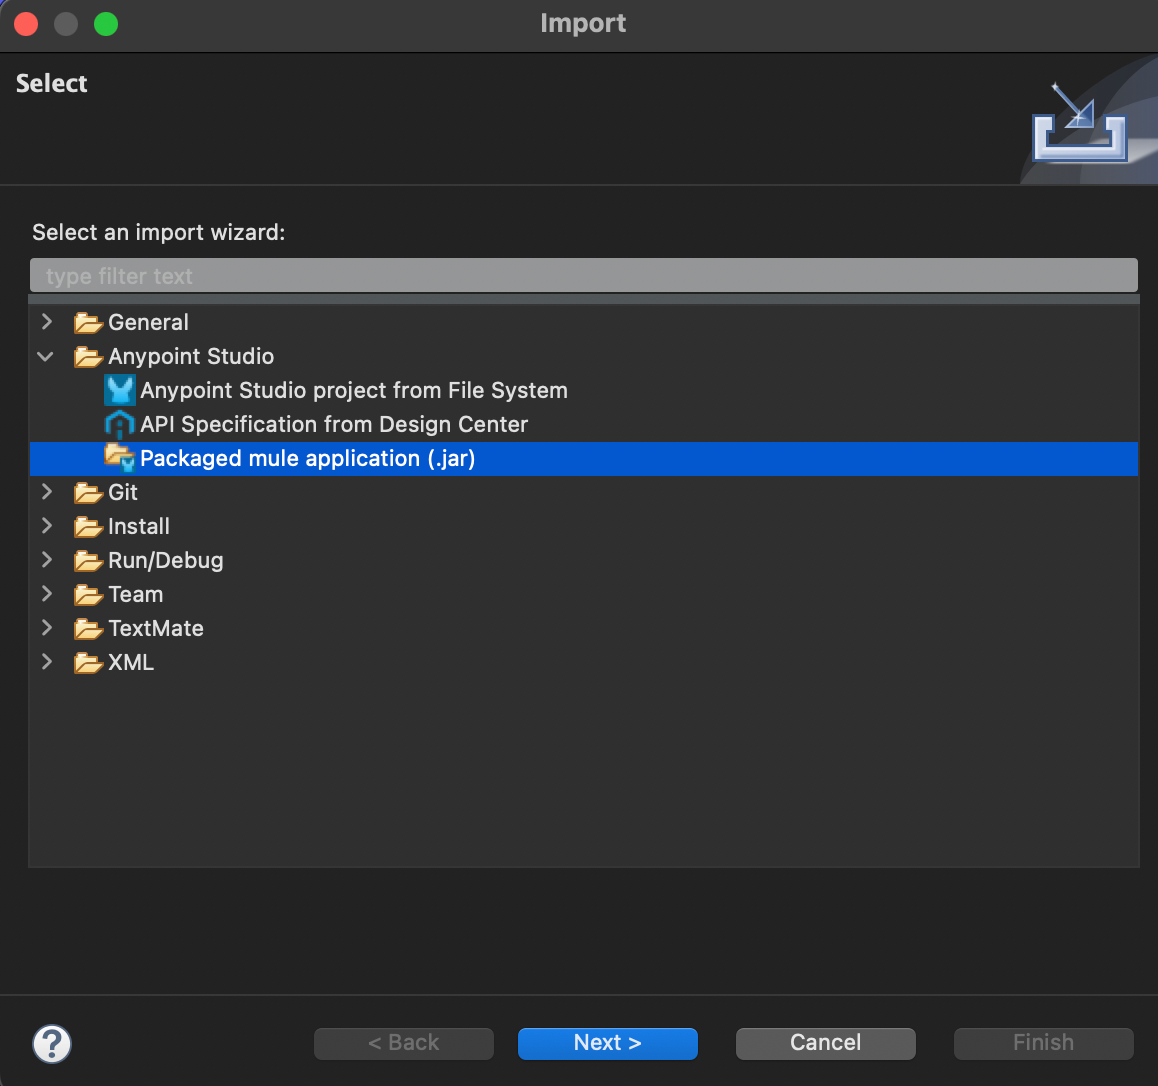
To import this file into Anypoint Studio:
-
Select File > Import…
-
Type jar into the import window.
-
Select Packaged Mule Application (.jar) then Next
-
Select the JAR file from its location on your computer.
-
Provide a project name of your choosing, then select Next. It will load into your Anypoint Studio workspace, where you will find three example Mule Flows.

Each Mule Flow represents a separate API call possible with the Pigment service:
- Import service
- Export metrics and tables
- Export transaction lists
To customise the samples with your own information, edit the local.properties file under the src/main/resources folder using the details in the obtaining your API information section.
A full list of attributes to edit are below:
- import.config
- app.id
- view.id
- list.view.id
- import.api.key
- export.api.key
- working.dir
ℹ️ You only need to configure the attributes according to the flow(s) you want to use. Feel free to discard any unused variables and flows.
Configuring The Request Module
Communication to the Pigment service is achieved through using the Request Module which is a standard component within Anypoint Studio.
-
Using the Mule Palette, drag a Request module onto the message flow section.
-
Click on the newly added request and navigate to the settings panel and check you’re in the general tab.
-
In the Configuration field, press the green plus button to create a new HTTP request configuration.
-
In the resulting window, set the following values:0
Protocol: HTTPS
Host: pigment.app
Port: 443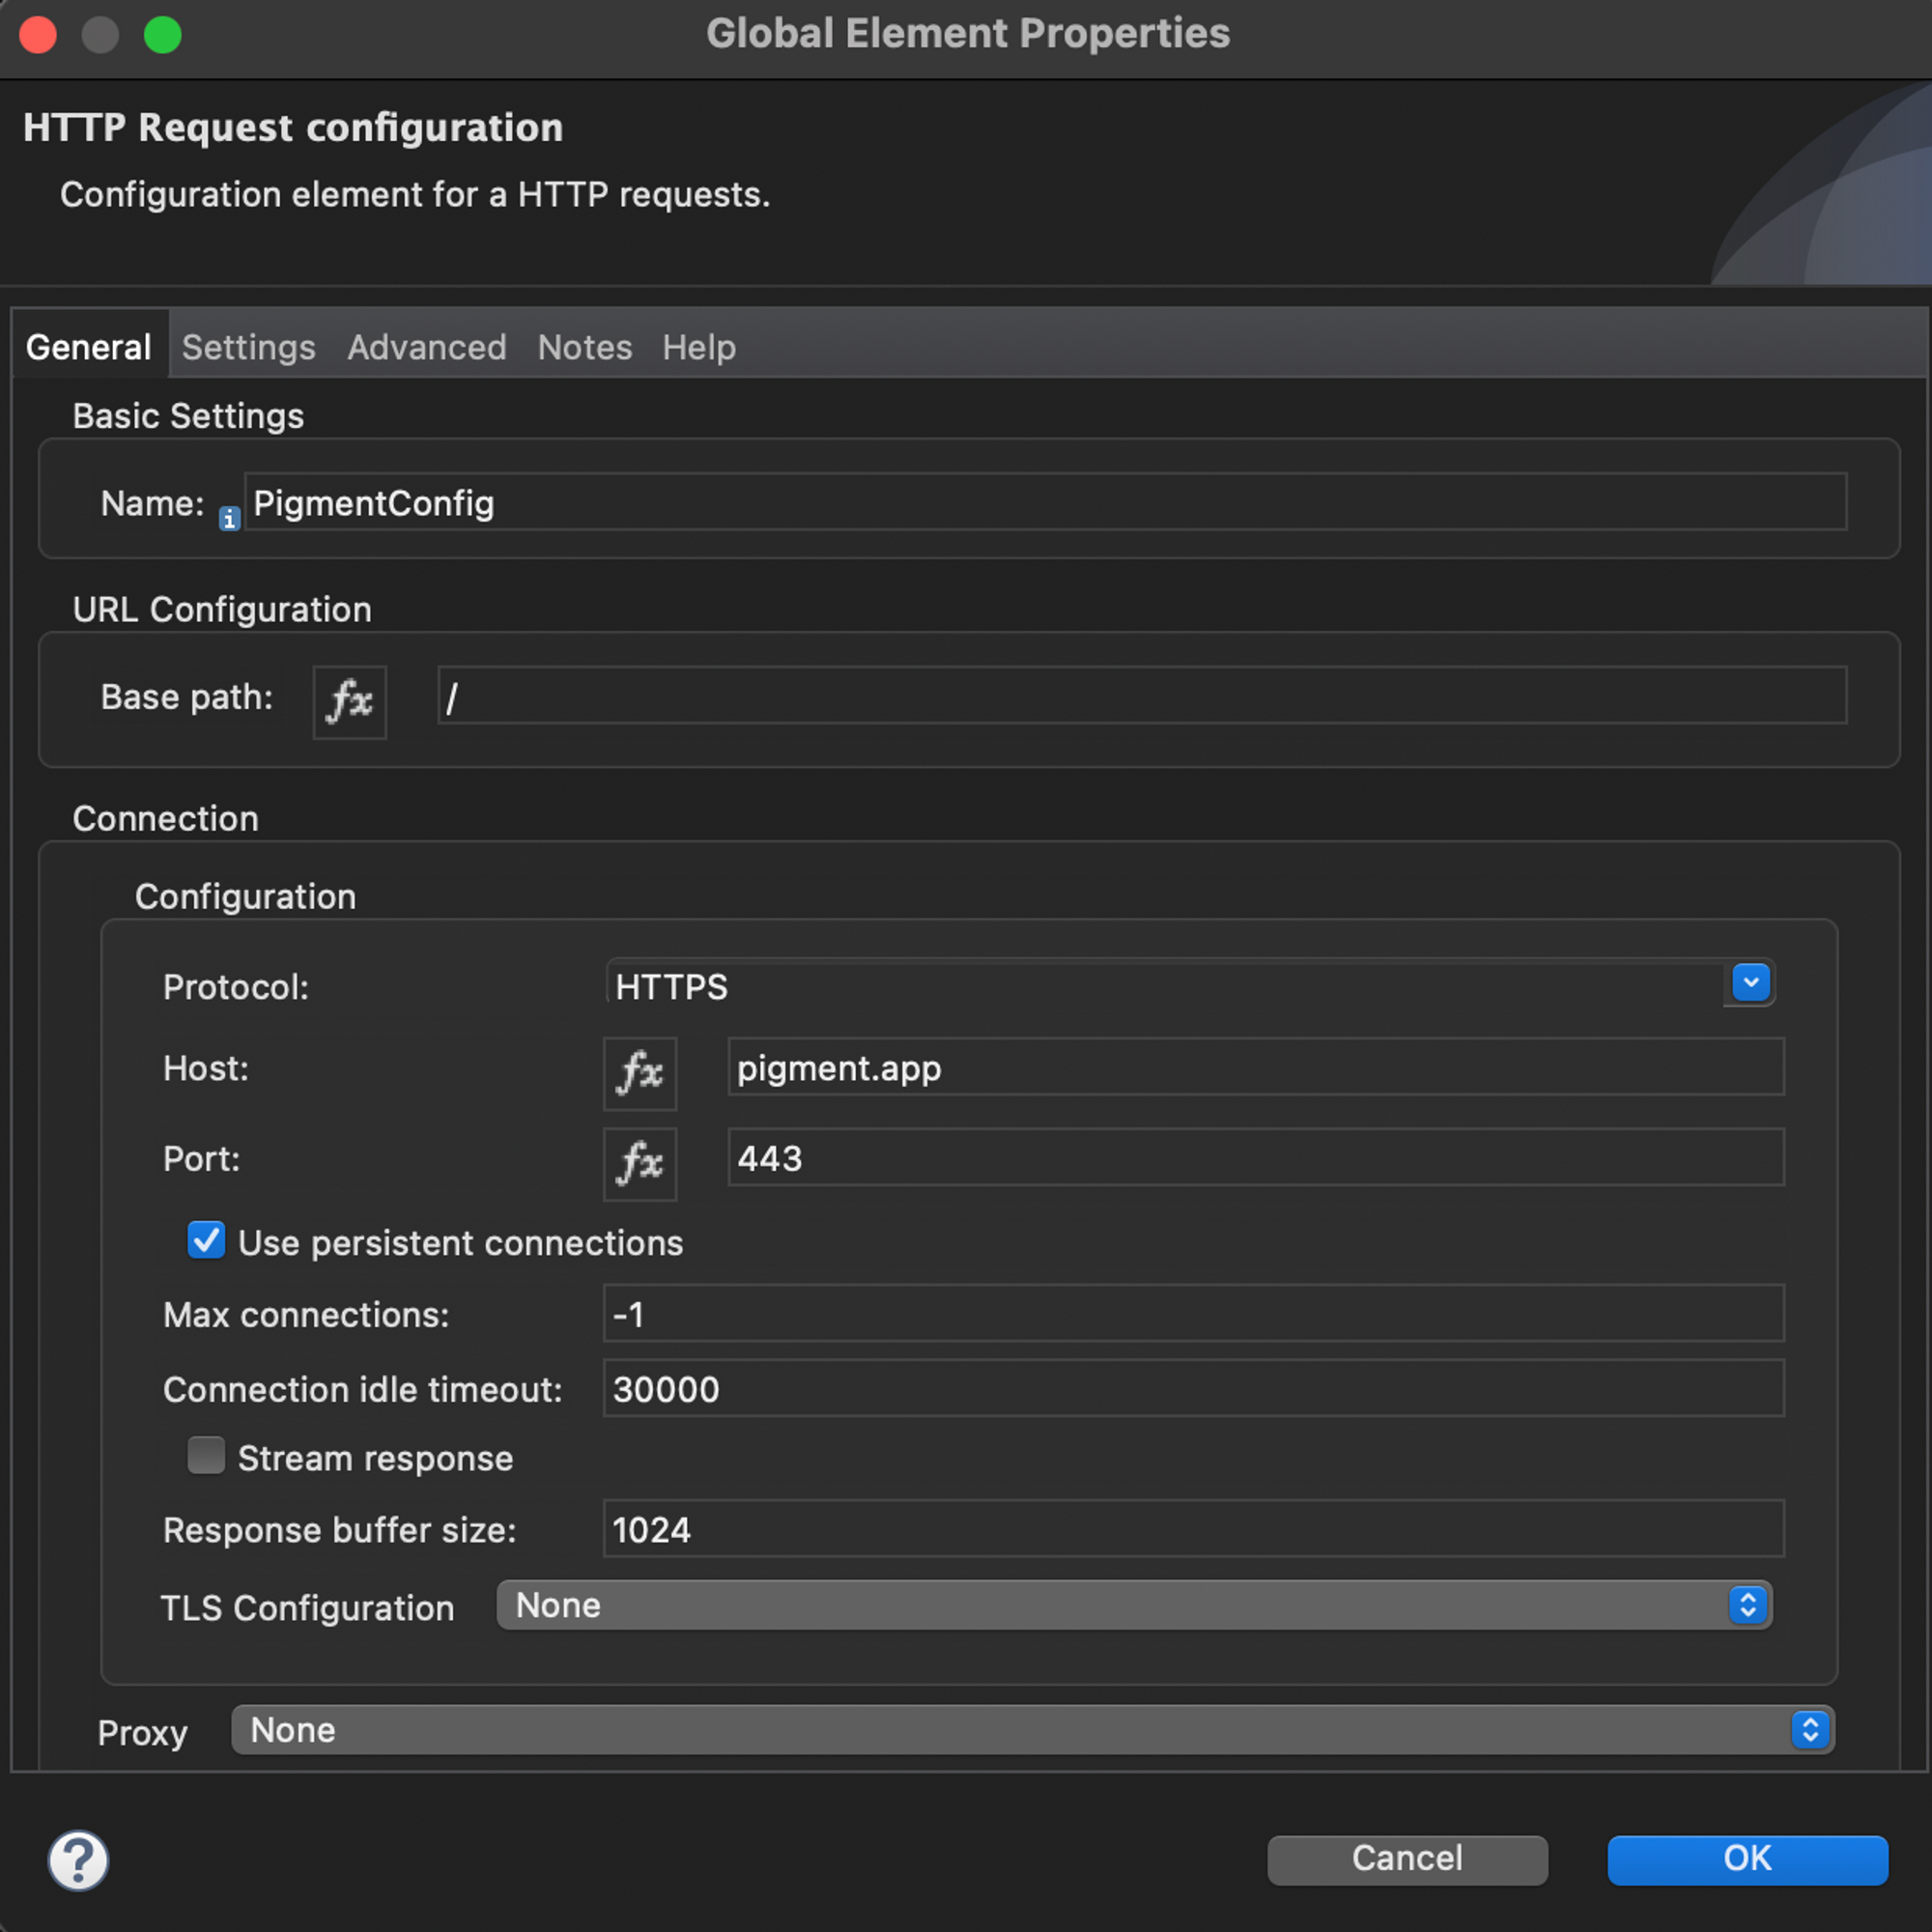
-
Leave the rest as defaults and save.
-
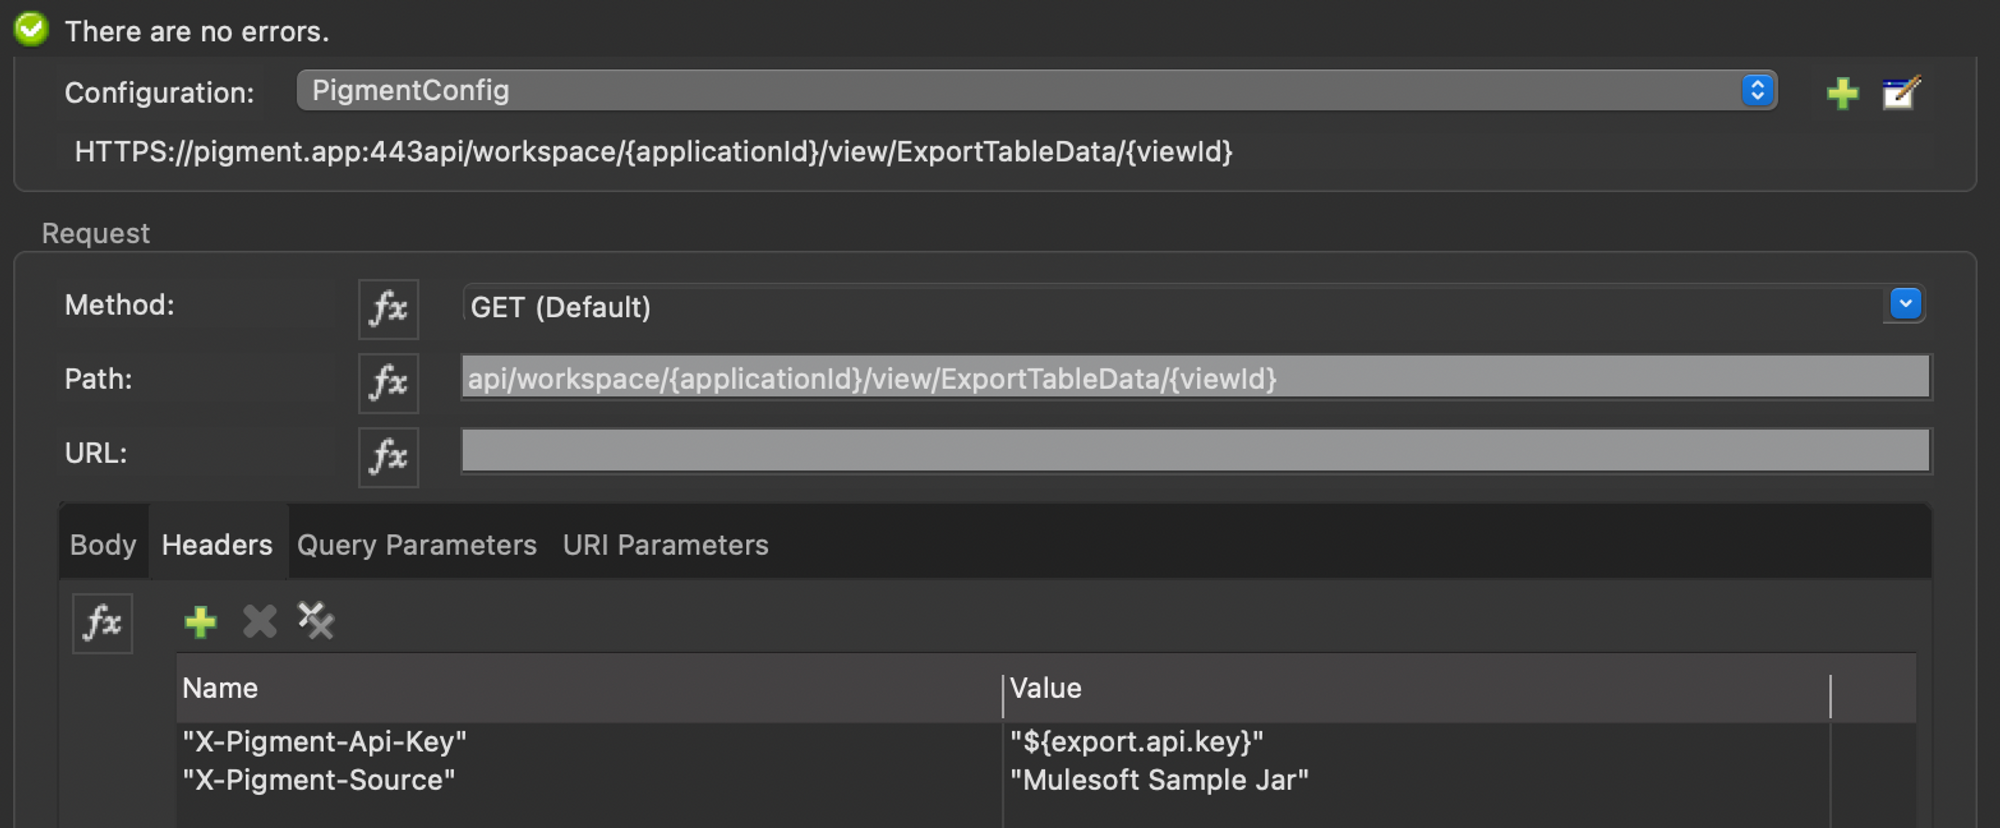
Back in the settings/general panel, set the following:
Method: GET or POST, depending on your required functionality.
Path: The URL path for your required functionality.
Note: Omit the pigment.app portion as that is configured in the host mentioned above.
You will also need to add variables to the URL depending on the method chosen, such as the application ID or the config ID.
Headers: Add the name “X-Pigment-Api-Key” with the value being your pigment API key.
ℹ️ To understand the correct values for your chosen API method, please refer to the Pigment API documentation:
ℹ️ You can also use a properties file and use referenced attributes instead of hard-coding values such as API keys and config IDs. Please refer to the Mulesoft documentation here for further information.
Your setup is now complete. You’re free to use the request module within any Mule Flow!