


The Pigment Connector for Excel allows you to load data into Excel from Pigment views. This article will outline how to use the connector, there are other articles on how to troubleshoot.
Pigment Connector for Excel is compatible with the following Microsoft Excel versions:
- Excel 2019 or later on Mac
- Excel on Mac (Microsoft 365)
- Excel on Windows (Microsoft 365)
- Excel on the web
Table of Contents
How to Install
Below are the instructions on how to install from the Insert tab within a Microsoft Excel Sheet, you can simply click on this link to go directly to our listing on the Microsoft AppSource marketplace.
To install the Excel Add-In, follow the instructions below.
- Open an Excel spreadsheet and navigate to the Add-Ins Store on your platform.
- Type Pigment Connector for Excel into the search bar.
- Locate the Pigment Connector Add-in and click Add.
- Use your Pigment credentials to log in.
Overview
The Pigment Connector for Excel allows you to pull data into a Excel from any view in your application. Once data is pulled into sheet, you can easily click a button to refresh your data.
Once data is pulled into a sheet, it will no longer automatically update if changes are made in the application. Think of it as an export from your application. However, you can pull in the latest data at any time.
Permissions
Users that have the Display Application Permission will be able to pull data from Pigment into Excel. Access Rights are applied so they will only be able to extract the data they have Read or Write access to.
How to pull data from Pigment into Excel
Data is pulled into Excel through Connections. Connections allow you to designate which views in Pigment you want to bring into Excel.
Each connection is created between Pigment and a single sheet. You can only have one connection per sheet. Follow the instructions below to set up a Connection. For each new connection, open a new sheet and repeat.
| 1. Activate the connector by clicking Insert Then Pigment. A sidebar called “Pigment Connector” will appear. | 
|
| 2. Click Login and enter your Pigment credentials. After you login, you can close the popup. If you do not see the Pigment login screen activate, please follow your browser-specific instructions to enable pop-ups. | 
|
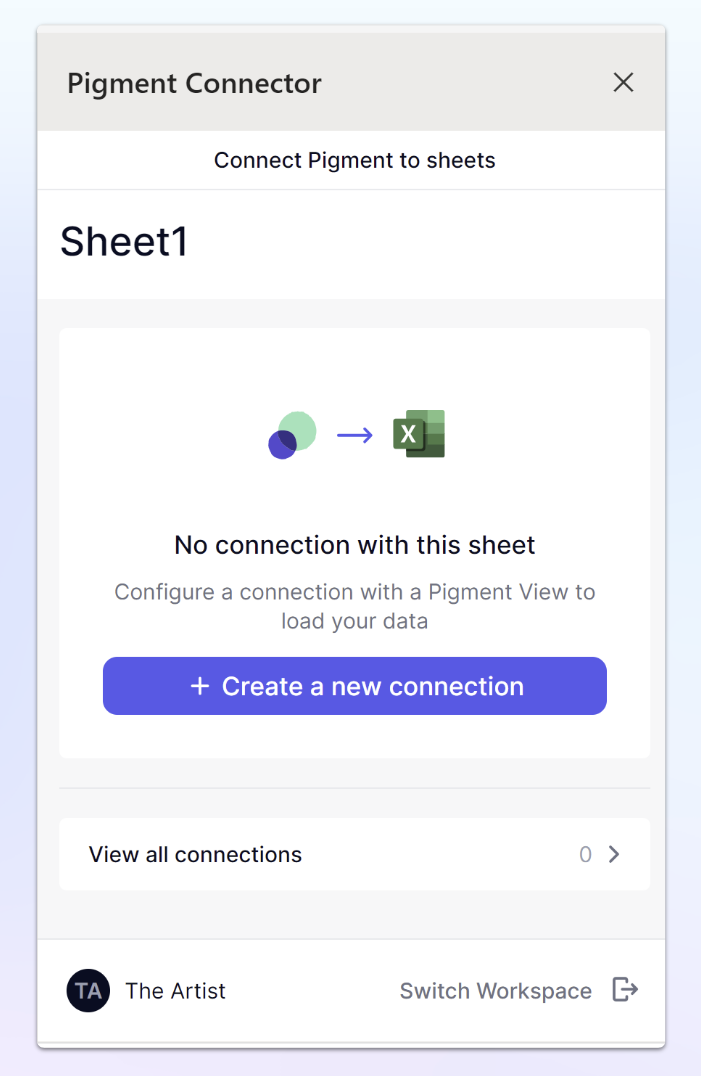
| 3. Click the “+ Create a New Connection” button to start to create a connection. |
|
Connector configuration options
| Source This section is dedicated to identifying the data in Pigment. Application : Choose the application that you wish to pull data from. You will see all applications within the workspace that you have access to. Block Select the Block you wish to import data from. You will not be able to view shared blocks coming from other applications via Libraries in the dropdown, unless they are being used in a block within the application you have access to. View Select the view you wish to import. If the view changes, when you refresh your data all changes will also be reflected. Because of this we recommend saving a specific view and not importing from the default. |

|
| Target This area defines the location in Excel where the data will be imported into. Sheet - Select the sheet that you want data to be imported into. You can only have one connection per sheet. Cell This is the cell in Excel where the data will start. It will be the top left of all imported data. By default it is set to A1. |
Working with Connections
Once a connection has been established you can refresh data, adjust page selectors, edit options and make duplicates.
Connections are set up one per sheet. To create another connection, navigate to a new sheet and follow the steps above.
Viewing Connections
At the bottom of the connector sidebar, you can click View all connections to see all the created connections for that spreadsheet.
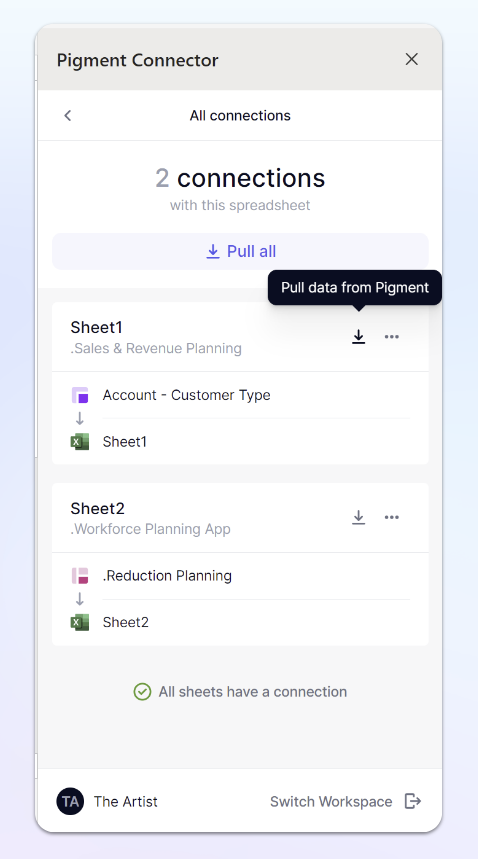
| From the All connections screen, you can identify all the connections for this Spreadsheet.
The Connection name will match the name of the sheet that it is established on. If you change the name of the sheet, the connection name will update the next time the connection is refreshed.
Under the Connection name, you’ll see the name of the Pigment application.
The block symbol and name will be located below that.
From the All Connections screen, you can select Pull All to refresh the data from all connections. You can also select the pull icon next to separate connections to run them individually.
You can click on the Connection name to open that connection or select the ellipsis menu to view more options |
|
Adjusting Page Selectors
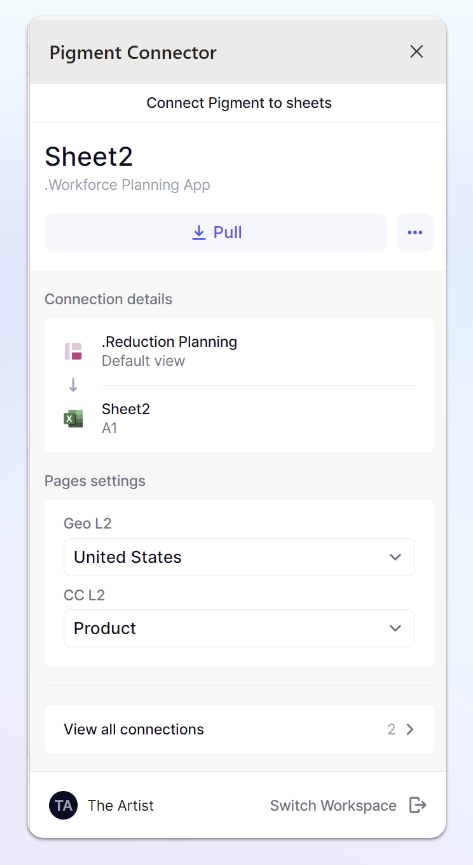
Within a connection, you can adjust the Page Selectors to define which data you would like to view. Under Pages Settings, you’ll see any dimensions that were in Pages from your view. You can adjust these to the desired date you wish to see. After adjusting the Page Selector, click the Pull button at the top to refresh the data to match the new selection..
Access Rights are still applied within the Excel connector. When working with Pages, users will be able to see all options. However, they will not be able to import data that they do not have access to within Pigment.
For example, if a user does not have access to US data. They will still the US as a Page Selector option but the data will not come through.
Adjusting Connections
Select the more options icon next to a connection to edit, duplicate, reload view configuration or delete a connection.
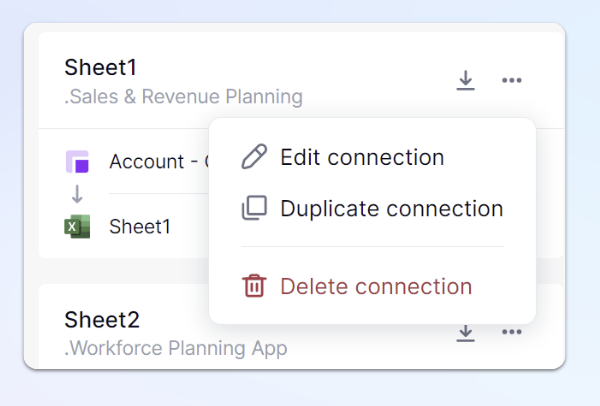
Edit connection - This allows you to adjust the Application, Block, View, and Target specifics.
Duplicate connection - This is used to replicate the configuration settings. When you duplicate a connection you need to specify a new sheet because you can only have one active connection per sheet.
Delete Connection - This will remove a connection.