This article focuses on how to automate your data import in Pigment using our scheduling capabilities. Once the configuration is set up, this article walks you through how to schedule the import to be run at certain intervals.
Table of Contents
October 2023 update : Metric to Metric Imports are now able to be scheduled.
As a prerequisite to configure a scheduled import, you first need to configure a Metric to Metric Import or a Pigment Connector from the integration page and save an import configuration using this connector.
Permission: only users with the Can Import Data permission in the application can access the Import Scheduling page and configure them.
Scheduler Prerequisites
It is important to note, that currently you can schedule Metric to Metric imports and imports using Pigment Connectors.In order to access the Pigment Import Scheduling page, you must also have the Import Data application level permission.
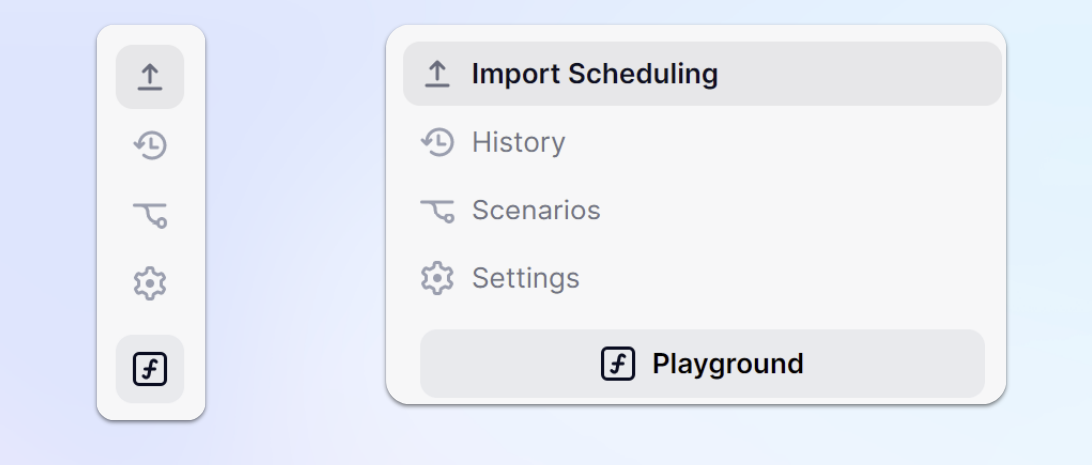
Accessing Import Schedule
All import scheduling configuration can be found in the “Import Scheduling” page. Each Import Scheduling is Application specific. To access it, first open up the Application you wish to schedule imports in. Then click on the Import Scheduling icon at the bottom of the Sidebar .
Scheduling an import
If it’s the first schedule of the application click on Set up scheduled imports. After an import is scheduled you can click Schedule Import to create more of them.
Schedule Options
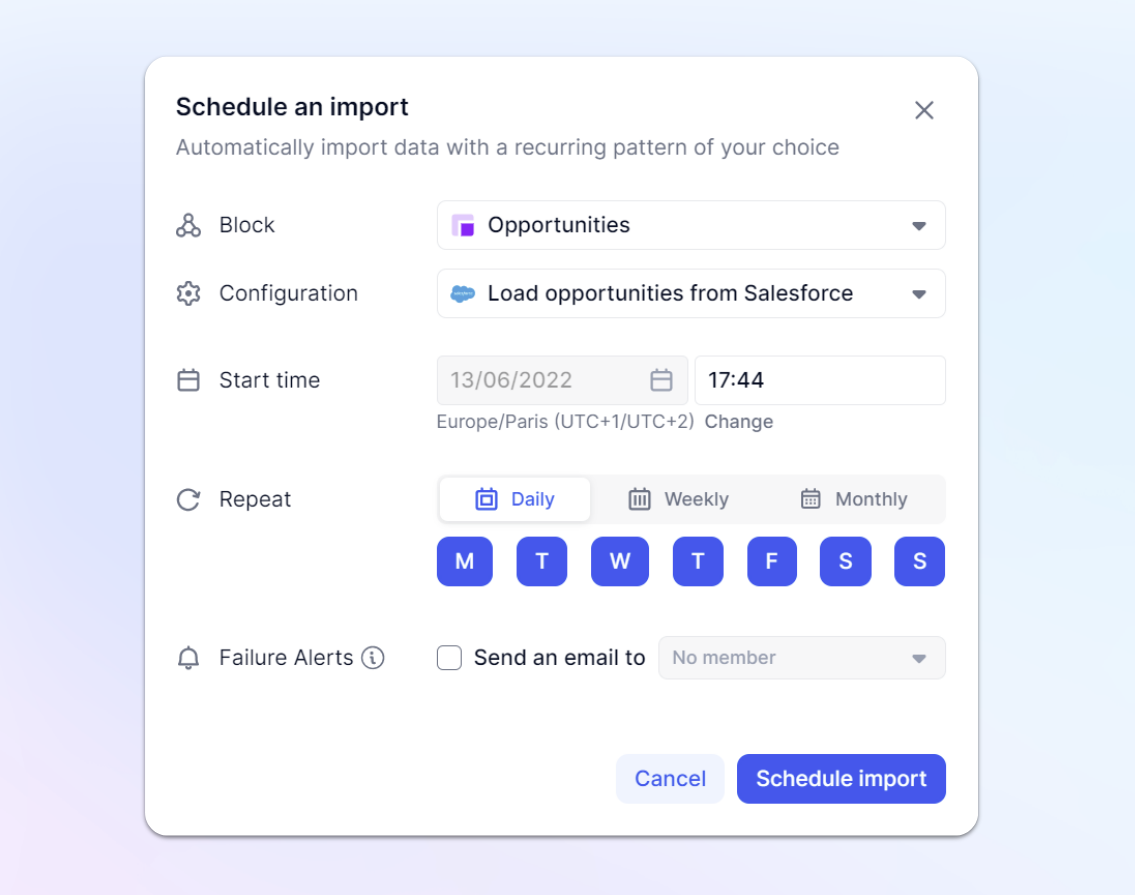
Here is the configuration you need to fill:
- Block: Select the Block you want to populate during the import. Note: only blocks with an import configuration using the a Pigment connector will be available.
- Configuration: Select the Import configuration you want to trigger.
- Start Time: Set the time at which the import should be scheduled. You can select the time zone that you want the import to be scheduled on .
- Repeat: Select the frequency of this import. Note: You can configure up to 4 different schedules on a given import configuration.
- Failure Alerts: you can enable this option to automatically receive an email if something went wrong during the import.
Now a scheduled import is configured! You don’t need anymore to come to refresh your data in Pigment!
Please note: If you need to create several scheduled imports for one connector, we recommend setting a different Start Time for each import (e.g. Import #1 1:00 am; Import #2: 1:05 am etc...)
Review and update your Scheduled import
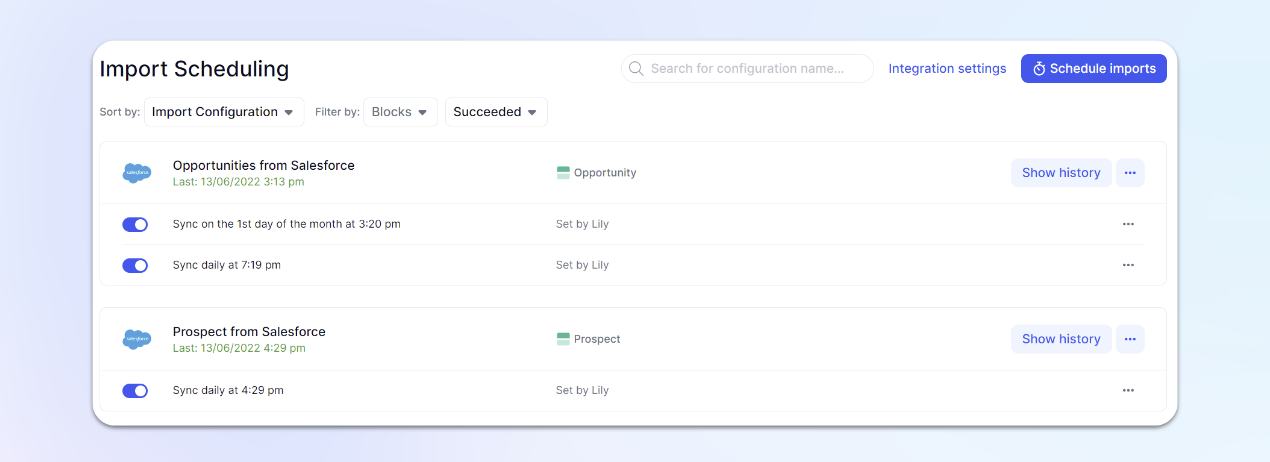
Now that the first import configurations are configured, you can use this page to monitor you scheduled imports:
Add new Scheduling option or run import now
| Each section represent an import configuration. Below each of those import configuration, we list all scheduling configuration associated to this import configuration. You can use the “Start an import right now” option to trigger the import directly from that page. | 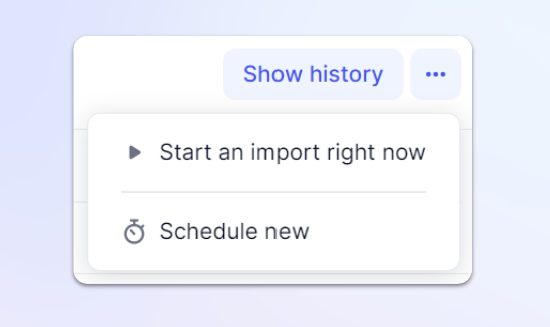
|
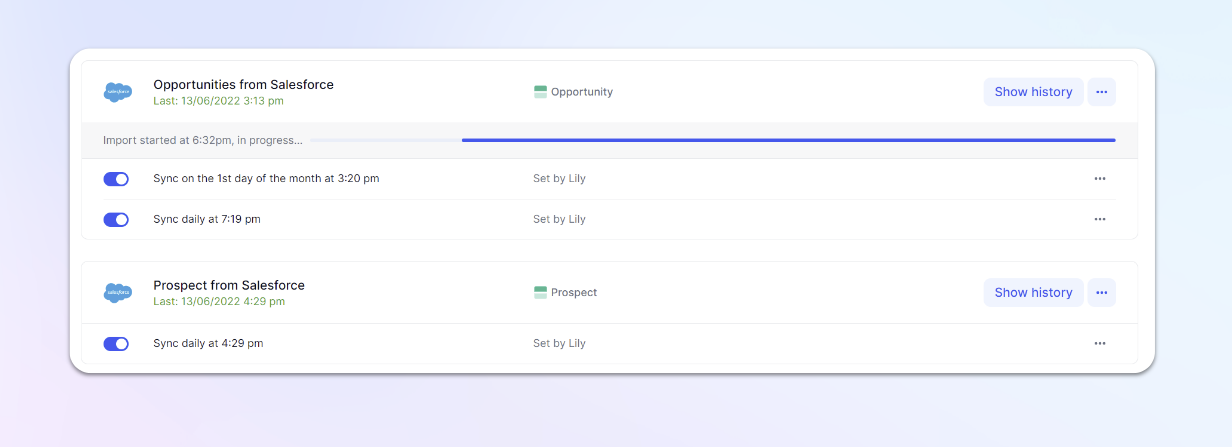
Enable and disable Scheduling Configurations
Next to each scheduled configuration is a toggle switch, you can use this enable or disable a scheduling configuration without deleting it. If you want to delete it, use Elipsis (...) at the end of the configuration to edit or delete.
Show History
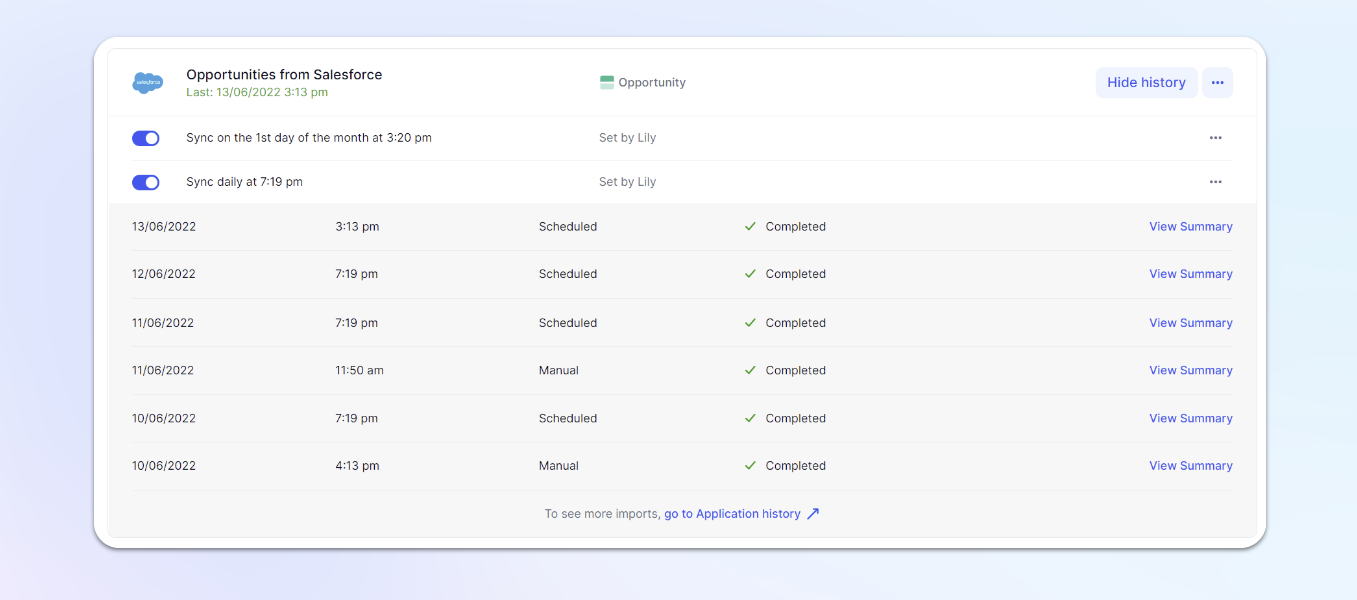
You can see every instance that a configuration has been run. Click on Show history to see each instance which was triggered. If you click View Summary, you can access the exact details of the import. This history will display both imports which were triggered with the scheduling configuration or manually.
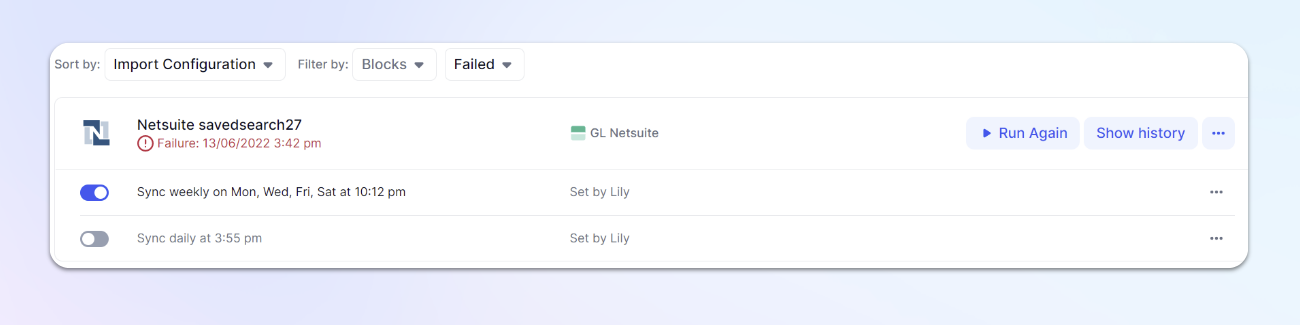
Handle import Failure
If for any reason the import fails, the import configuration will be flagged with a “Failed” status and email notification will be sent if the “Failure Alerts” option was enabled. Check the history to get more details on the root cause of this failure. Once the problem is solved, click on “Run Again” to confirm that the problem is solved and flag back the import configuration to a “Success” status.