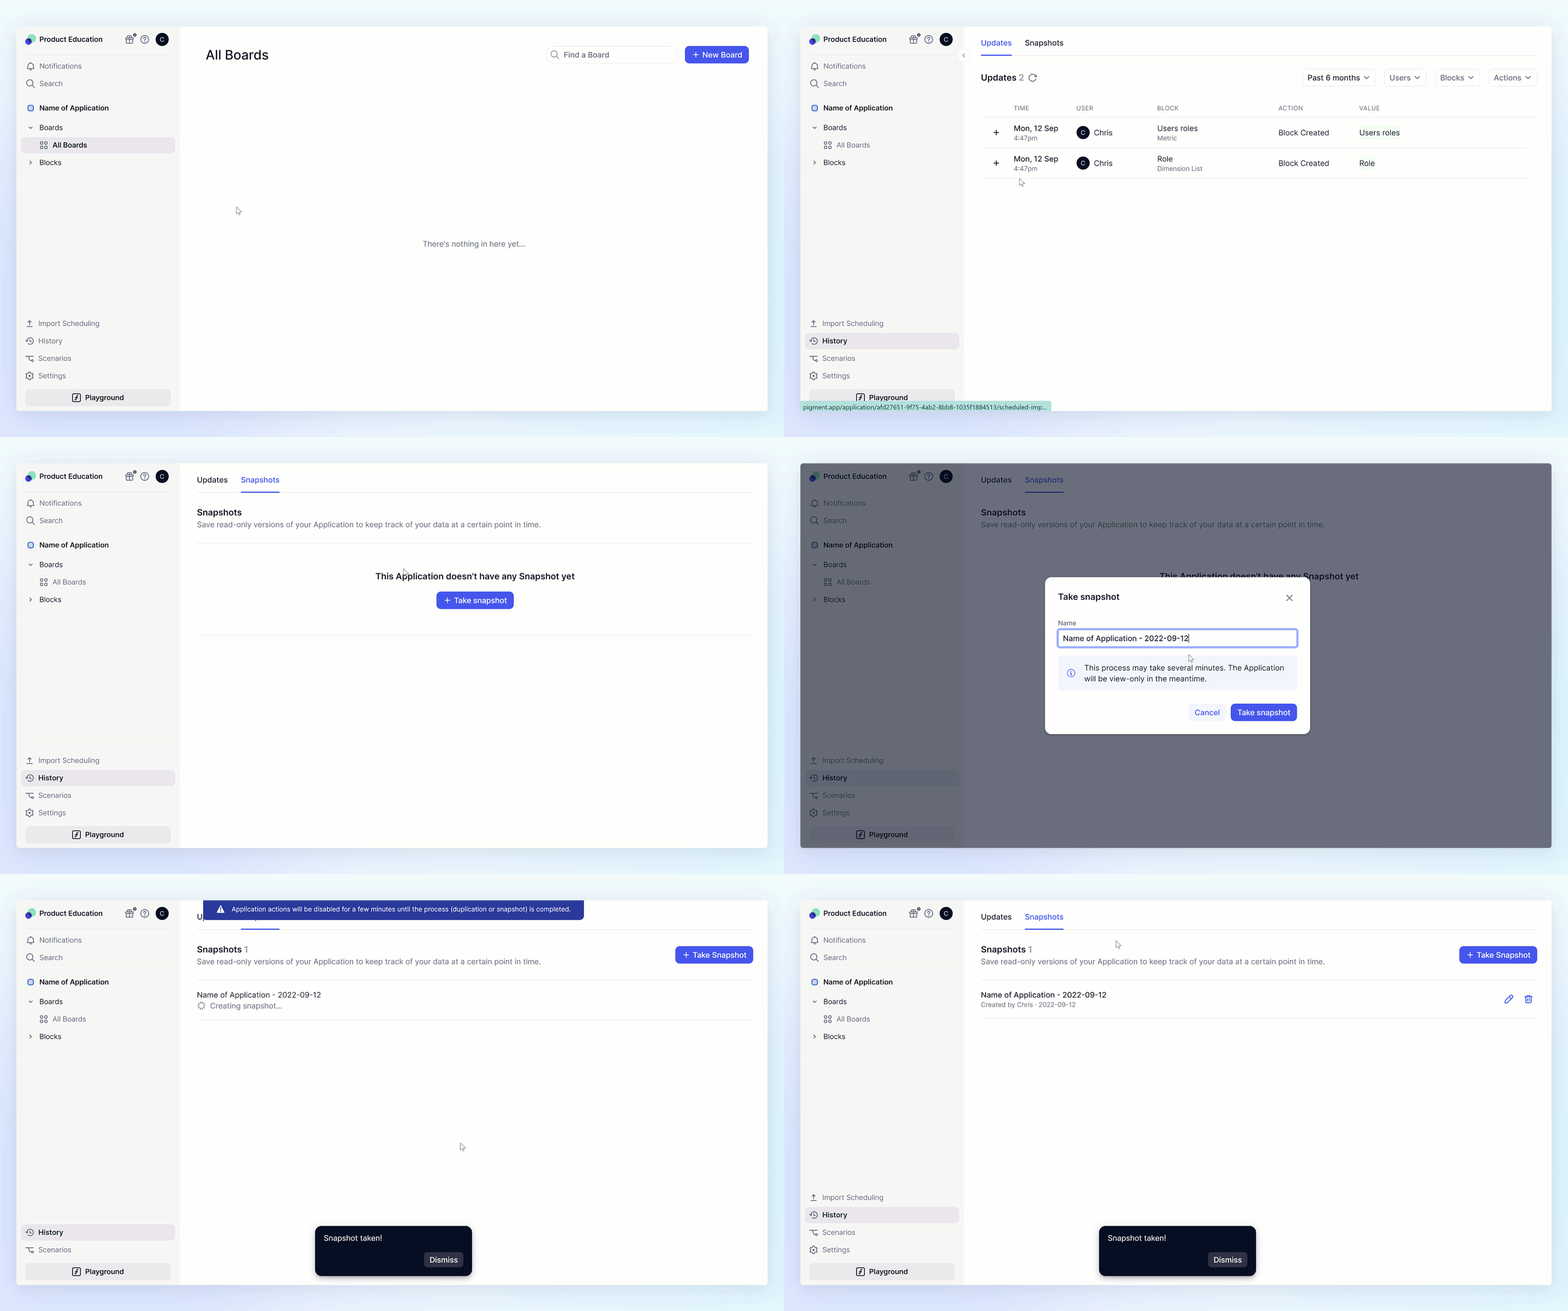
A Snapshot preserves the state and data of an application at a specific point in time. The state includes all the Blocks, data and Boards.
Please note that Snapshots of an Application can't be edited. This way, you can be sure your figures won’t change. Therefore, you can compare your data with snapshots or retrieve old data.
It also preserves the Access Rights as they are when the snapshot is taken. So if you modify them later, the snapshot will not be updated.
Take a Snapshot
- Click on History > Snapshots > Take Snapshot
- Type a name for your snapshot. Every snapshot must have a unique name. By default it will take the date of the day the Snapshot was taken.
- Click on Take Snapshot

Depending on your application’s volume, this operation can last a few seconds/minutes. While you are taking a snapshot, you cannot edit your application.
Refresh your page after a short moment to verify if your snapshot is done.
When to take snapshots?
We recommend you to take periodic snapshots.
It is also a good thing to do before important model changes, in case someone accidentally break something 😉.
Edit a Snapshot
You can rename a snapshot by clicking on the related pencil icon.
You can delete a snapshot by clicking on the related bin icon.
Note
The only thing that you can edit in snapshots are scenario names, in the case where scenarios are activated on your application.
This is allowed to enable scenario comparisons between your application scenarios and your snapshot scenarios.
Example: Let’s say you have two scenarios “Default” and “Optimistic”, and you take a snapshot for the end of Q3. Your snapshot scenarios are still named “Default” and “Optimistic”.
So if you need to compare them, you would not be able to tell which one is coming from the snapshot.
Therefore, you can navigate to your snapshot and rename your scenarios.
When you are in the snapshot (via the History tab), navigate to the Scenario tab and click on the three little dots options icon. Click “Edit Scenario” and rename it, for instance: “Default - snapshot Q3”


Then activate the scenario comparison between “Default” and “Default - snapshot Q3”

Now, in your grid, you can easily differentiate both!


