


𝅘𝅥𝅮 Workflow 𝅘𝅥𝅮 Workflow 𝅘𝅥𝅮 Workflow 𝅘𝅥𝅮
In today’s corporate world, there are workflows for everything everywhere. There are tools that are dedicated to business workflows. Pigment is not one of these. However the flexibility of our business modeling platform is such that you can set up the workflow you need directly in Pigment, relying on our logic language you love. Let’s see how !
The example & the goal
We’ll use an example contained in our Workforce planning app: a business user makes a request for a new hire. Let’s apply proper validation rules on that process.
First goal is to build a one step validation workflow: when the business leaders validates their input, the process will be to request the validation of another user (FP&A).
The basics: use Access Rights for workflow
Before going into a real-like business case, let’s do a very simple example to show you the basics of how to use AR for workflow.
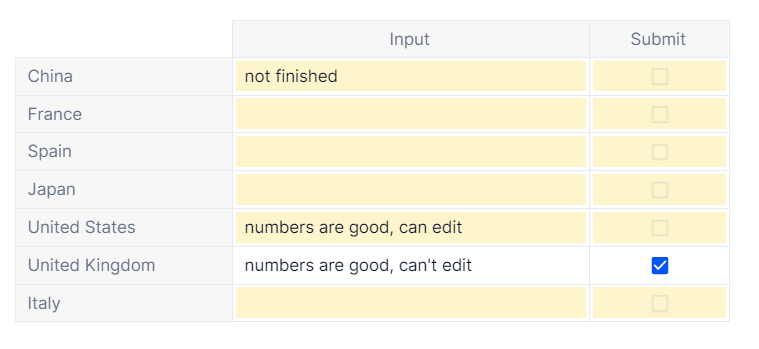
Let’s imagine an input by country. We want the inputs to be locked for a given country when a corresponding user has defined that the numbers for that country have been finalized. This is a table of two metrics dimensionalized by Country dimension:
It is actually super simple:
Create a metric in the Security folder:
Name: ARM_01_Country Workflow
Type: Access Rights
Dimensions: User, Country
Note: all AR metrics have to have the User dimension
With the following formula:
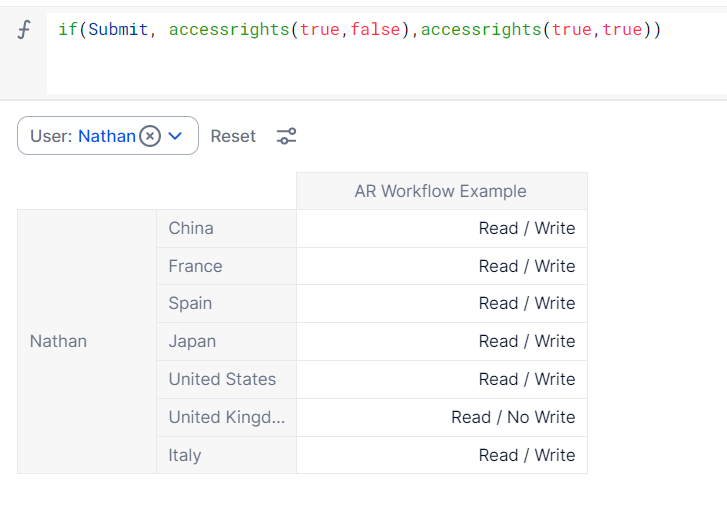
Now that you have this metric, you can apply it as a security rule in the Settings → Security
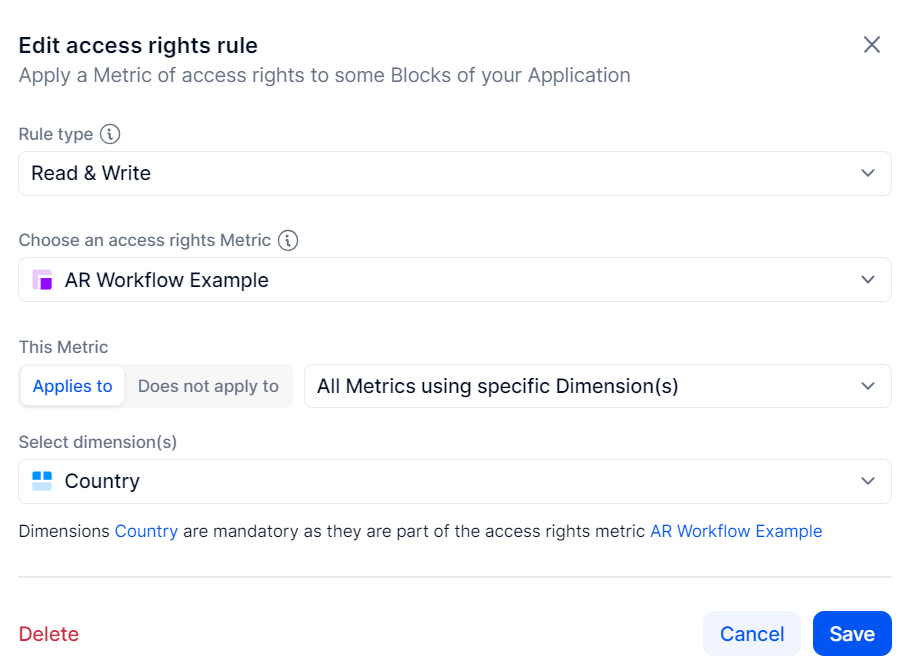
Note: you can choose another rule than “All metrics using specific Dimension(s), for example manually select the specific metrics
That’s it ! check your table, if you submit, the row is locked.
So now that you have the basics, I imagine your brain is running with all the possibilities of modeling. Up to yes, turn based multiplayer games ;)
But first, let’s go through a business-like use of workflow together
The real-life build
Starting Point
Below is the table we will be starting from: these metrics are dimensioned by Versions, Cost Center, Country & TBH Request (the 1 to X dimension in rows).
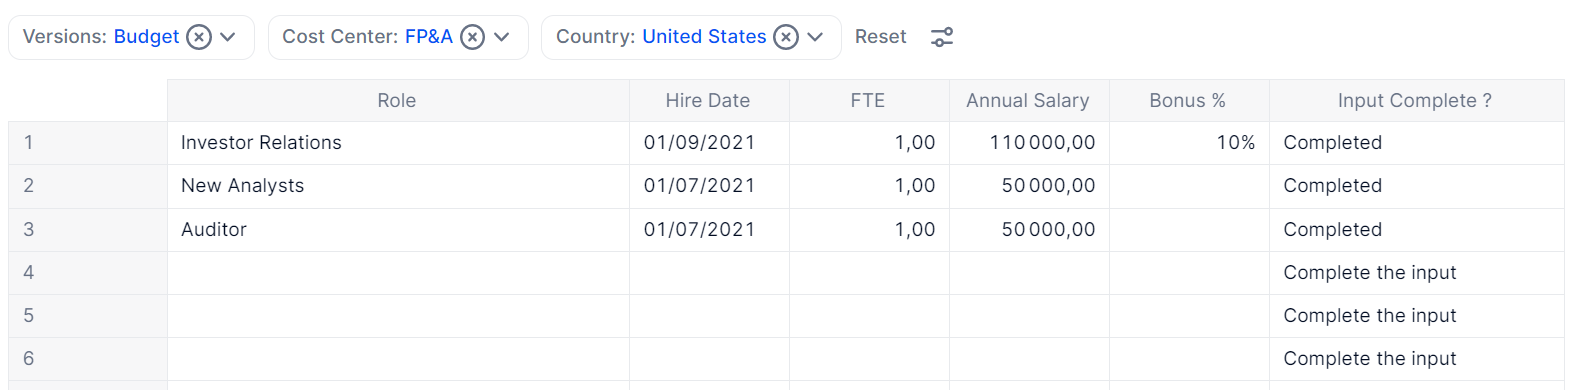
Most of the metrics in this guide will be created from the table, so they will automatically have these dimensions. Ask your CSM to get this app in your workspace so you can follow this guide or create a simple version of it.
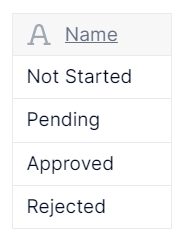
We’ll also use a dimension called “Validation Status” with the following items:
Step 1: the basis of send for approval
First thing to do is to allow the end user to tag this request as being “ready” and ask for validation.
Let’s start with a TBH-Input Complete metric, of type Boolean, which will have the following formula:
IF(ISDEFINED('TBH-Annual Salary') OR ISDEFINED('TBH-Role') OR ISDEFINED('TBH-Hire Date') OR ISDEFINED('TBH-FTE'),TRUE,FALSE)This is to check the input is correct
Next, we’ll do that with a Boolean metric, let’s call it ‘TBH-WKF Send for Approval’.
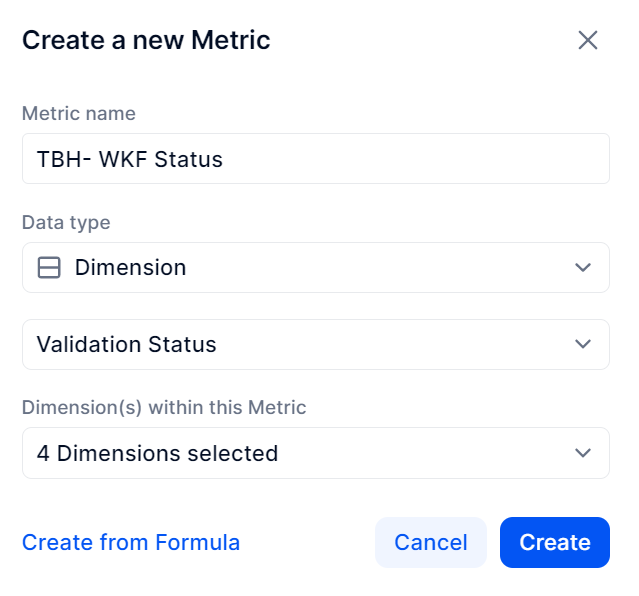
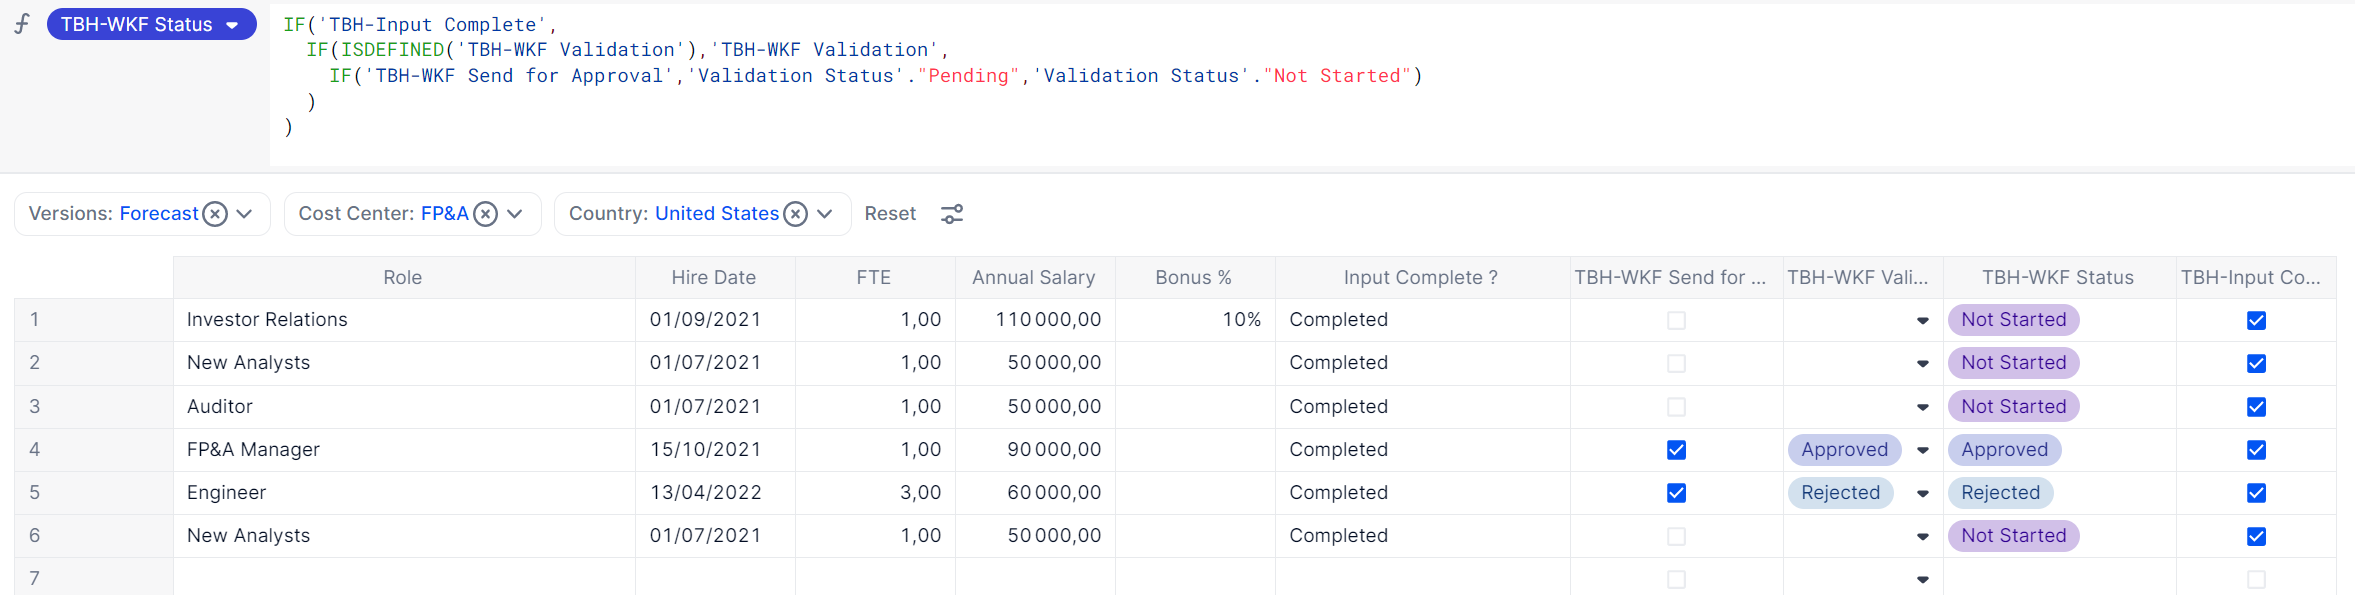
Finally, create a metric called ‘TBH-WKF Status’ of type Dimension : Validation Status.
For now, let’s keep the metric of this final formula simple:
IF('TBH-Input Complete',
  IF('TBH-WKF Send for Approval','Validation Status'."Pending",'Validation Status'."Not Started")
)
What does this do ? When the user clicks the boolean, the status will become “Pending” if the line is correctly inputted. We added the check of input complete to force the user to complete all data before validating.
Your table should look like this:

Step 2: Access Rights on the submission
Ok so now that a business user has sent a request for approval, they can still edit it. That’s not right. We will restrict the ability to edit for the user when the request has been sent.
To make things easier, start by opening the Role dimension (in the Security folder) and add a new Boolean property called “End Users”.
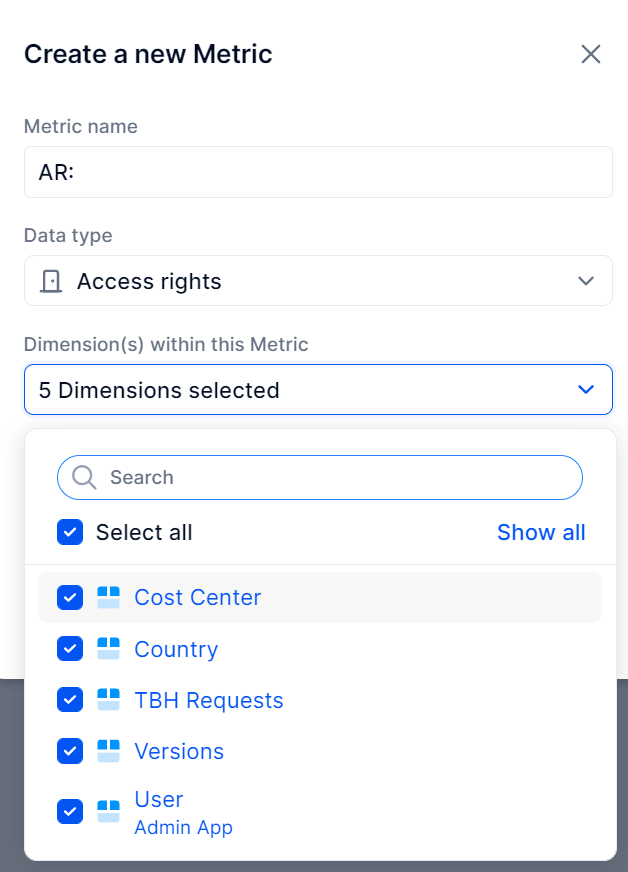
Now let’s create together an AR metric that will lock access: it will need the same dimensionality as the metrics it needs to lock, hence Versions x Country x Cost Center x TBH Request and, like all AR metrics, the User dimension, so 5.
The formula should be as follows:
if('Users roles'.'End User',
  if('TBH-WKF Status' <> 'Validation Status'."Not Started",accessrights(blank,false))
)
And your metric should be like this:
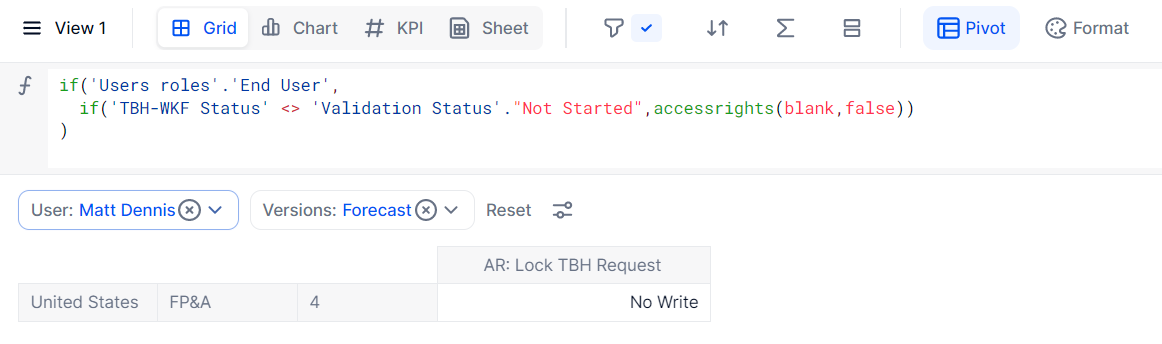
Note: only the lines that have been sent for validation will be shown here. In the real system, AR rules will add on top of each other, users will also be impacted by which Country x Department they can access.
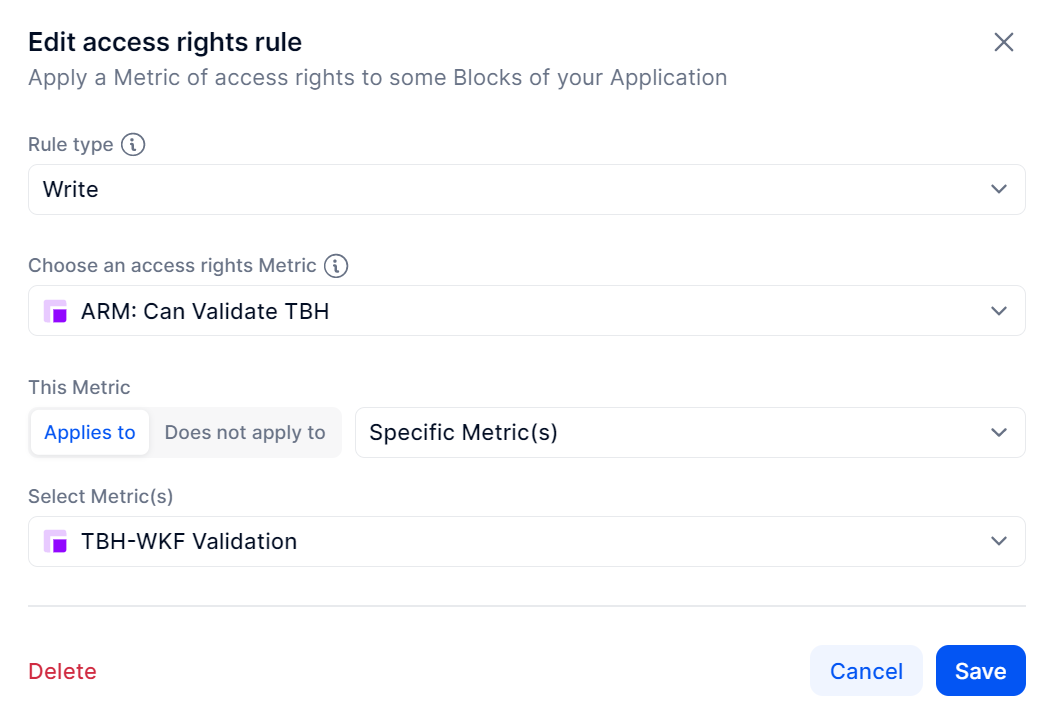
Ok so, you have made the logic, all that’s left is to apply it as a Security rule. For that open the Settings, go to Security, scroll to the section of Access Rights rules and add a new rule, as below:
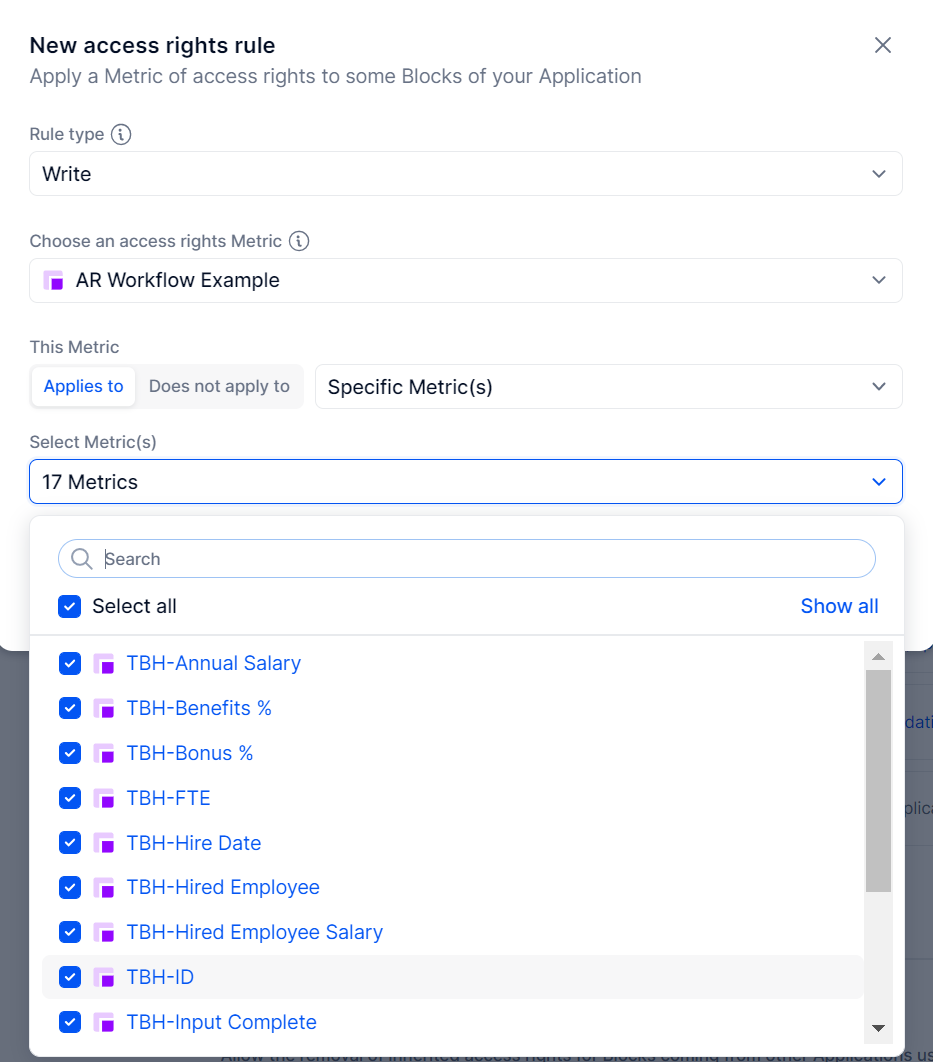
As mentioned above, what we are managing here is the capacity to Write, not read, so I changed the rule to Write only.
For a workflow AR rule, I advise using the “Specific Metric(s)” option, which will lock only what you want. if you had a comment metric for example, it could stay open (yes that means if you change your input and add a new metric, you’ll need to add it to the AR rule).
Step 3: Validation
Let’s add a final step to our workflow: a validation
In the table, create a new metric called TBH-WKF Validation, with the 4 dimensions of the table and of type Dimension → Validation Status
You should be getting this:

To make the status of the request change, we need to change the formula, adding another IF statement like this:
And here you can see the final result as well.
Note: you can create a view/board to show to the validators all the request that have been submitted and not yet validated
Step 4: AR on validation
Yes, we need to make sure not everyone can validate !
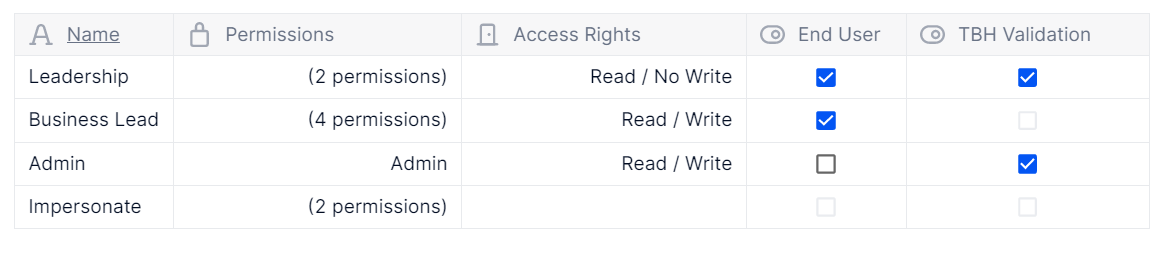
The easiest is to create a setting in the Role dimension of who can edit this metric.
Open the Role dimension and create a boolean like this:
Now, just like before, we need to create an AR rule to apply it as Security.
Create a metric ARM_Can Validate TBH of type AR like this:
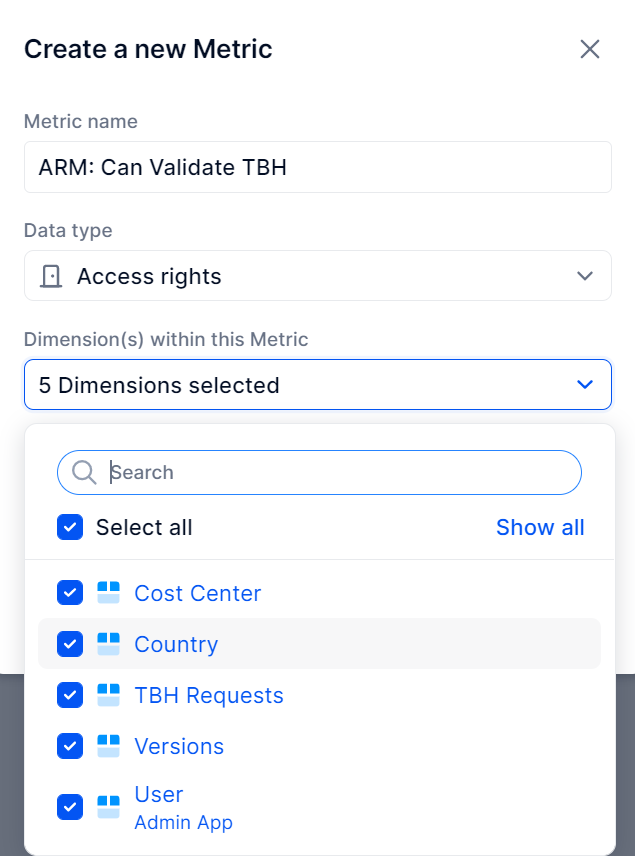
We could create it in a simpler way but in this case I want to showcase the fact that Validator will only be able to validate when the requests has been submitted.
The formula should be as below:
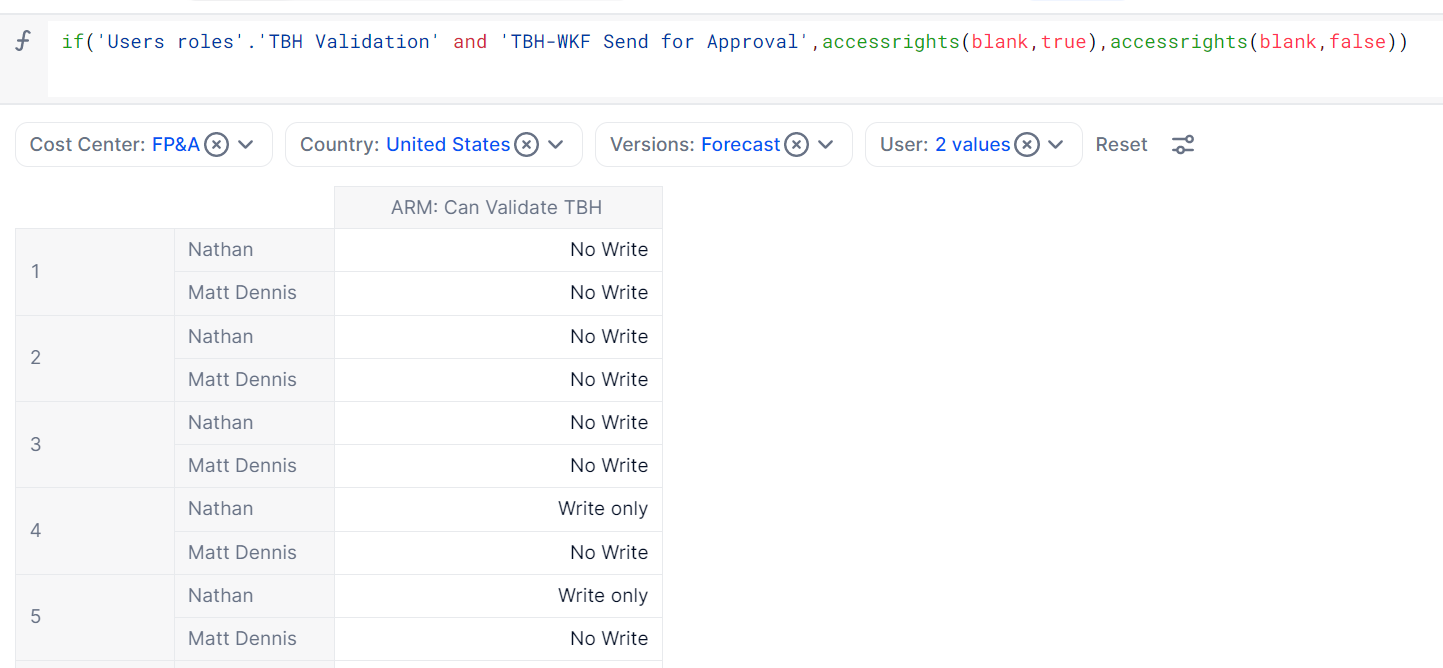
The logic is simple and you can see the expected result: Standard users (Matt) cannot write while the roles identified as “Validators” (like myself) can.
All that’s left is to apply it in Settings → Security → Access Rights
And that’s it, you have your workflow !
What’s more ?
You can always add more layers & complexify the workflow: lock validators from editing until the TBH is submitted, do back & forth rounds of validations etc.
And you can apply the same logic to any business process. In the end it is simply TRUE/FALSE depending on IF statements and a Security rule on the right metric.
BONUS: Multi Level Approval
What if you need both HR AND Finance to approve a request ?
No problem !

I have added a new dimension in the structure of the metric TBH-WKF Validation called Validation Multi Level, so that each team can have their own say.
And the big formula you can see on the screenshot is my way of simplifying the logic of checking the status.
You could do a bigger IF statement checking if both have been validated, if any is rejected etc.
But by putting a value on each status, it become easier & logical:
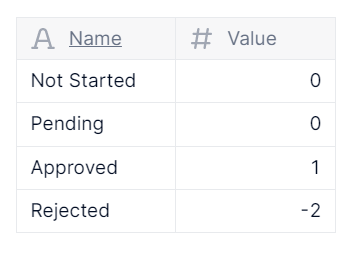
Because by taking the SUM of the value of each validation level (this is what the [REMOVE:Validation Multi Level] is doing), we logically know the status.
2 is Approved because Approved (1) + Approved (1) = 2
The value for Rejected needs to be equal to the number of steps. And if you make the values in the formula = to the number of Steps, it means your app will automatically adapt to having a new validation step by just adding one to the list.

That’s the beauty of Pigment !
I’ll leave you with an exercise: your task is to apply AR on each validation level depending on the role of the user.