


The purpose of this article is to provide instructions on how to set up a basic workflow process in Pigment. 👓
The two processes we will cover are:
- Data load and data validation: Functionality to allow admins to see what data has been loaded by month and what months have been validated

- Management of admin tasks: Functionality to allow admins to track their monthly actions

Data Load and Validation
Step 1: In your Data Hub, create a ‘Data Load Status’ Dimension List with the following 3 items:
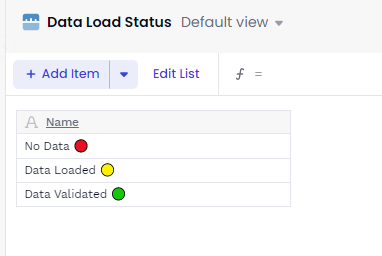
Open the Block settings and share the Block. Then, make sure you have enabled the shared Library from the Data Hub in your your Target Application.
Tip: You can add Emoji’s by right clicking in the formula bar and pressing emoji. These can be pasted into the item name column.
Step 2: In your Target Application, create a Metric called ‘Data Load Status by Month’ with format as ‘Data Load Status’ Dimension. The Dimensions of the Metric should be Month, and any another Dimension that you would want to validate by, for example, Account, P&L Category or Country.
In our example we will load data by Country.
Step 3: The formula for ‘Data Load’ should be:if(ISDEFINED('P&L Actuals'.'Amount in USD'[BY: 'P&L Actuals'.'Period Mapped','P&L Actuals'.'Country']),'Data load status'."Data Loaded 🟡",'Data load status'."No Data  ")
")
Where'P&L Actuals' is a Transaction List that holds your actuals data. 'P&L Actuals'.'Month'is a Month Property and 'P&L Actuals'.'Country’ is a Country Property.
Step 4: Open the Block settings and enable ‘Metric Override’. The formula shows item ‘No Data’ in Countries and Periods where there are no values, otherwise it shows ‘Data Loaded’. Once a user has validated the data, they can then override ‘ Data Loaded’ with ‘Data Validated’. This gives us a simple way to track our monthly data load process
.
Step 5: Create saved view and publish to Board 

Management of Admin Tasks
Step 1: Create the following Dimensions within the Data Hub. Update the items with what’s appropriate for your business and processes.
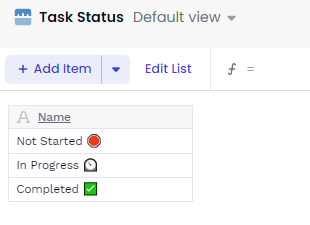
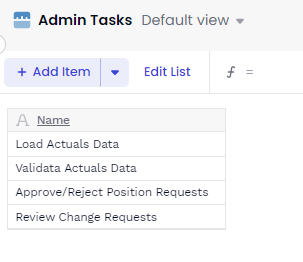
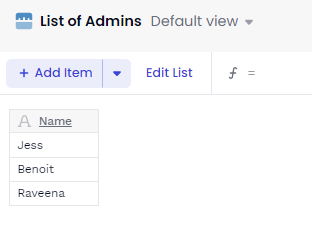
For each Dimension, ensure the Block is shared. Also, make sure your Target Application has enabled shared libraries with the Data Hub.
Step 2: In your Target Application, create a Metric called ‘Task Status by Month’ with format as ‘Task Status’ Dimension. The Dimensions of the Metric should be Month, and Admin Tasks.
Step 3: In this Metric, write the following in the formula bar:
'Task Status'."Not Started  "
"
Go to Block settings and enable ‘Metric Override.’
Step 4: In your Target Application, create a Metric called ‘Task Owner by Admin’ with format as ‘Task Owner’ Dimension and the Dimension should be List of Admins.
Step 5: Create a Table with both of the above Metrics. Create saved views and publish to Board
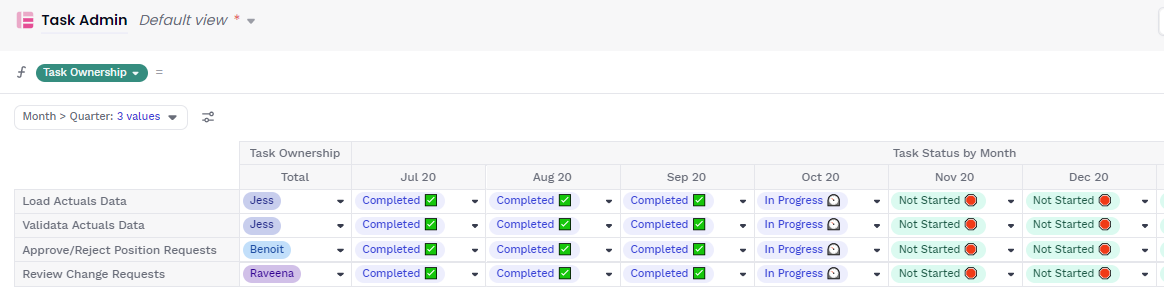
The admins (on a monthly process) would be responsible for managing the fields in the Table based on the progress they have made.
