


Purpose
This article provides a step-by-step guide on how to set up centralized User Access. The article covers how to use Master User Roles to automatically assign Permissions and Access Rights in multiple applications.
Although there are different ways to set up centralized User Access, some methods are better suited in different contexts. The approach outlined in this article is efficient and easy to use in many scenarios.
Note: There are alternative methods where you set Access Rights by User or by Local Application role. These methods are not covered in the article. Feel free to adapt the process to meet your needs. Master User Roles are best to use when you want to set up a list of different business roles in your company that will give the relevant rights that all apply the same way in a set of different applications. It is well suited with a centralized management of your Pigment Workspace. In some rare cases where you have split management within your workspace (e.g. different teams owning different applications with no central management, this too works because you can create separate Master User Roles depending on the realm of each team.
This article is based on the Legacy Access Rights system. You can identify which system you are on by navigating to Roles, permissions & access section and seeing if there is an Unspecified option for read or write permissions within a Role.If you see the Unspecified option, you are on Legacy. If you do not see it, you are on the current system. For more information, check out this article.

Pre-requisites:
-
A Data Hub
-
1+ Target Application
Table of Contents
Example Use Case
We’re going to use a Data Hub application where we will set our User Access. Apply the User Access to the Standard APP: Core Reporting Application. User Access includes setting up both Permissions and Access Rights.
It is assumed all applications would have the same Access Rights Rules.
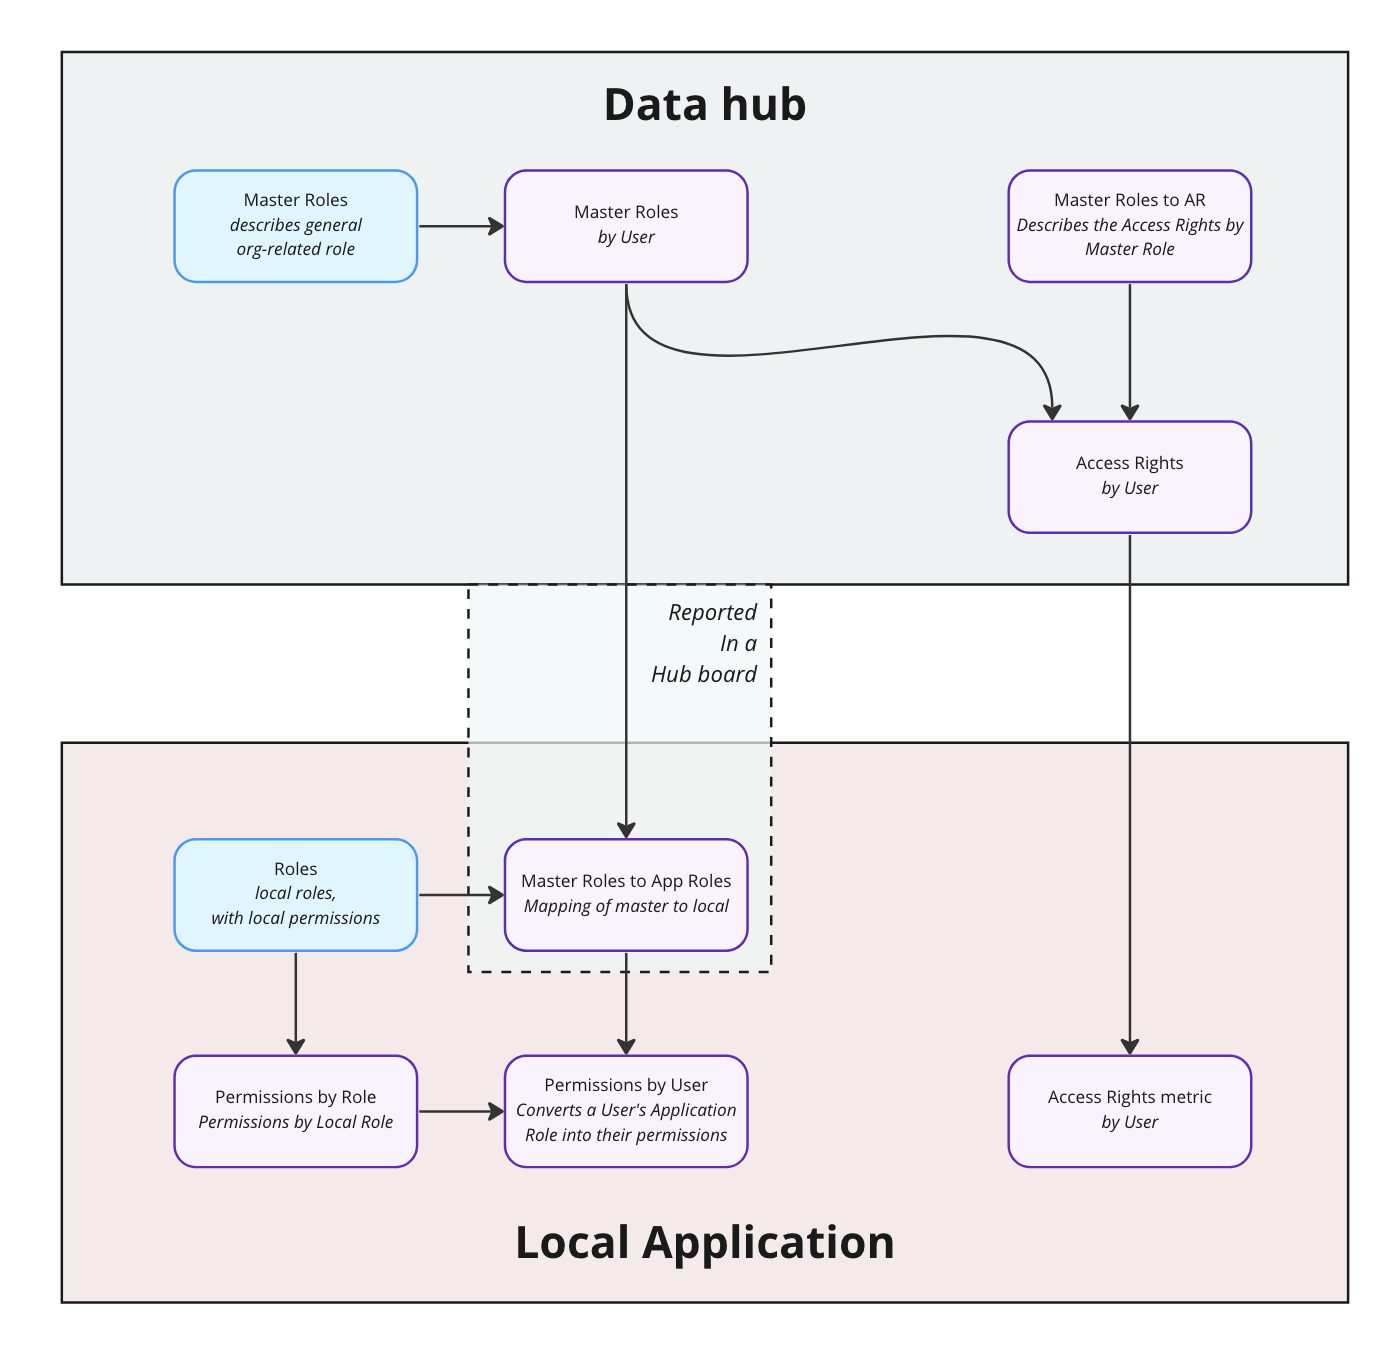
A summary of the User Access Architecture we will be is:
In our example use case, there are four types of users requiring different user access:
-
Admin: Full Access to all applications
-
Super User: Like Admins they have full access to everything. The only difference is these users are not allowed to write formulas.
-
Division Heads: READ/WRITE to their own Division, including the department within the division. Cannot access data outside their Division.
-
Division Managers: READ/WRITE to their own Division. Cannot access data outside their Division.
Note: Divisions are the parent of Departments, so the relationship is as follows:

Step-by-Step Guide
Set up Centralized User Roles
-
In the Data Hub, go to the Security folder and edit the Role Dimension to have the following three Roles:
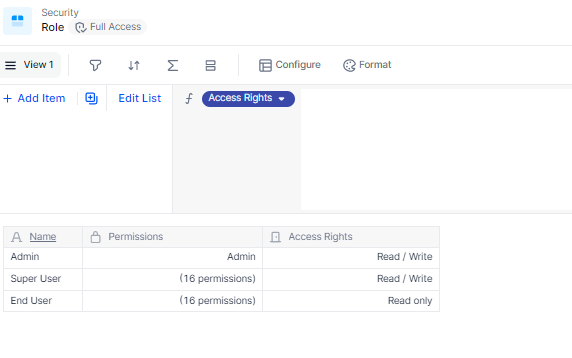
The Admin User Role is created by default for each application. Leave the default Permissions and Access Rights for this role. Admins will have full access to the Data Hub.
End User Role
-
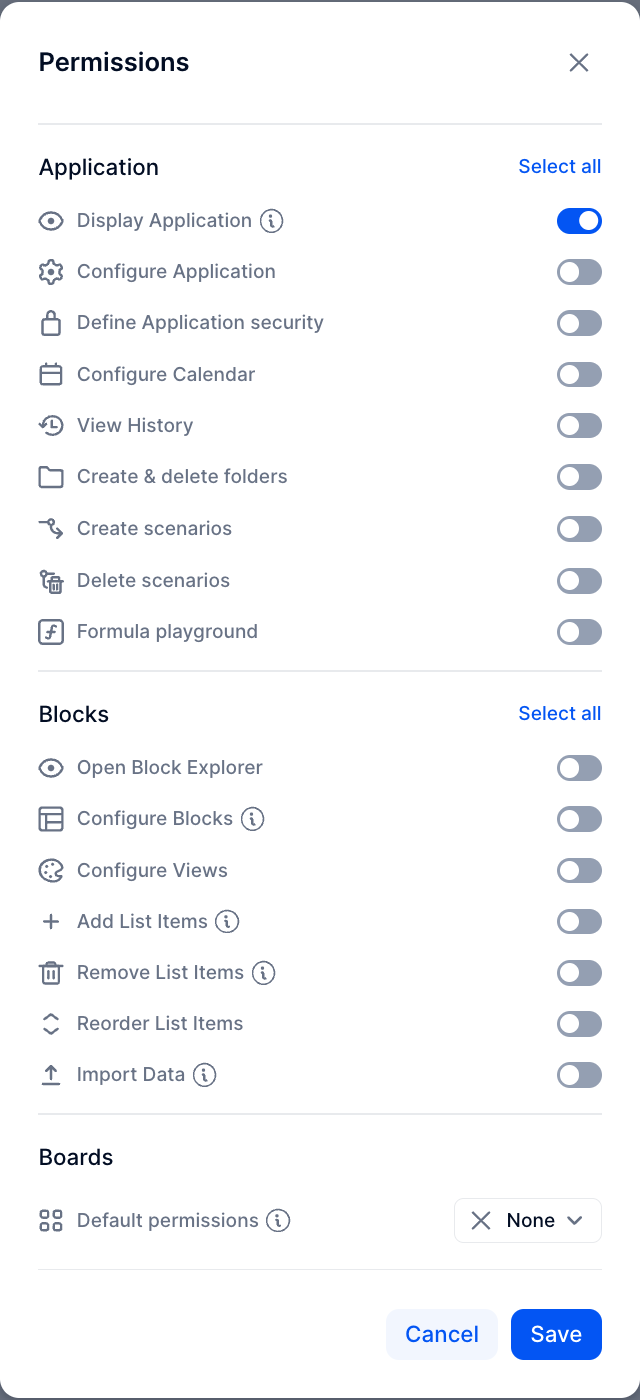
To edit Permissions for the End User role, double-click the Permissions column.
-
Set up the permissions as follows:

This will give any user with the “End User” Role, access to READ data in the Data Hub, however, they will not have access to open the Data Hub.
This means that they’ll be able to see any data that’s coming from the data hub (e.g. your business dimensions, currency rates, etc.) but they won’t see the application in the home page or be able to explore the data hub. This is perfect because we want the end-users to concentrate on the business applications.
Super User Role
-
To edit Permissions for the Super User role, double-click the Permissions column
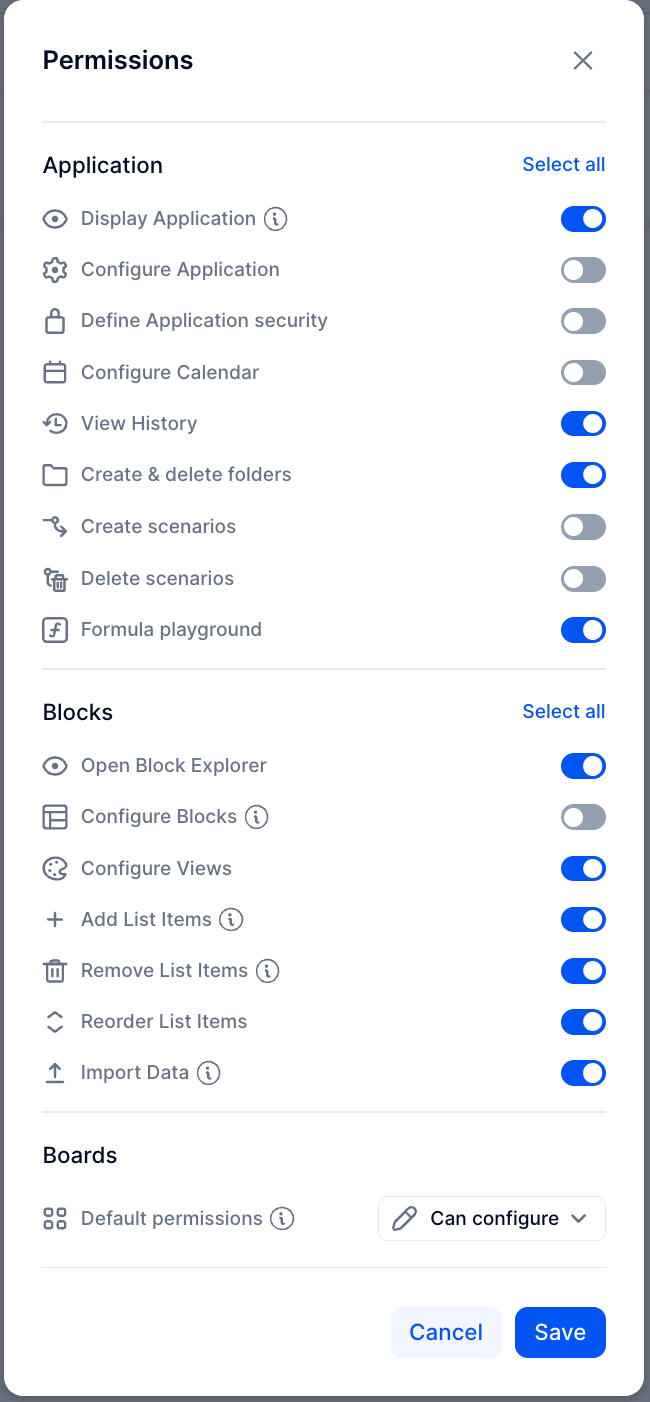
Super Users will be able to do almost everything, except edit formulas and do key workspace functionality.
Creation of the Master User Role Functionality
-
Create a Master User folder in the Data Hub.
-
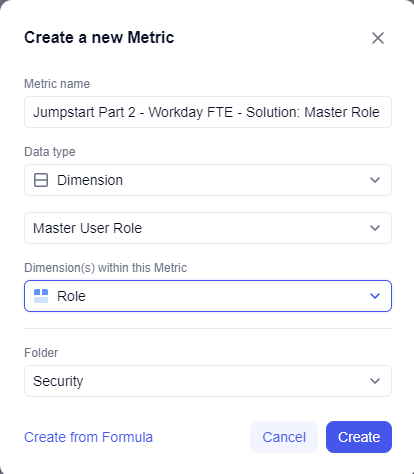
Create the ‘Master User Role’ dimension in the Master User Role Folder.
Place any Metrics created in the Data Hub in the Master User Role folder unless otherwise stated. -
Add Admin
-
Share the ‘Master User Role’ dimension.
-
Add every combination of Master Data Role as items within the dimension (these can be completed later on).
Each Item should be a continuation of the Role & the specific Access Right Requirements. So if they are a Department Manager, and should have access to the Marketing Department, then create an item “Department L2 Manager: Marketing. A clear naming convention is very important here.

Create a Metric to assign Users to Master User Roles
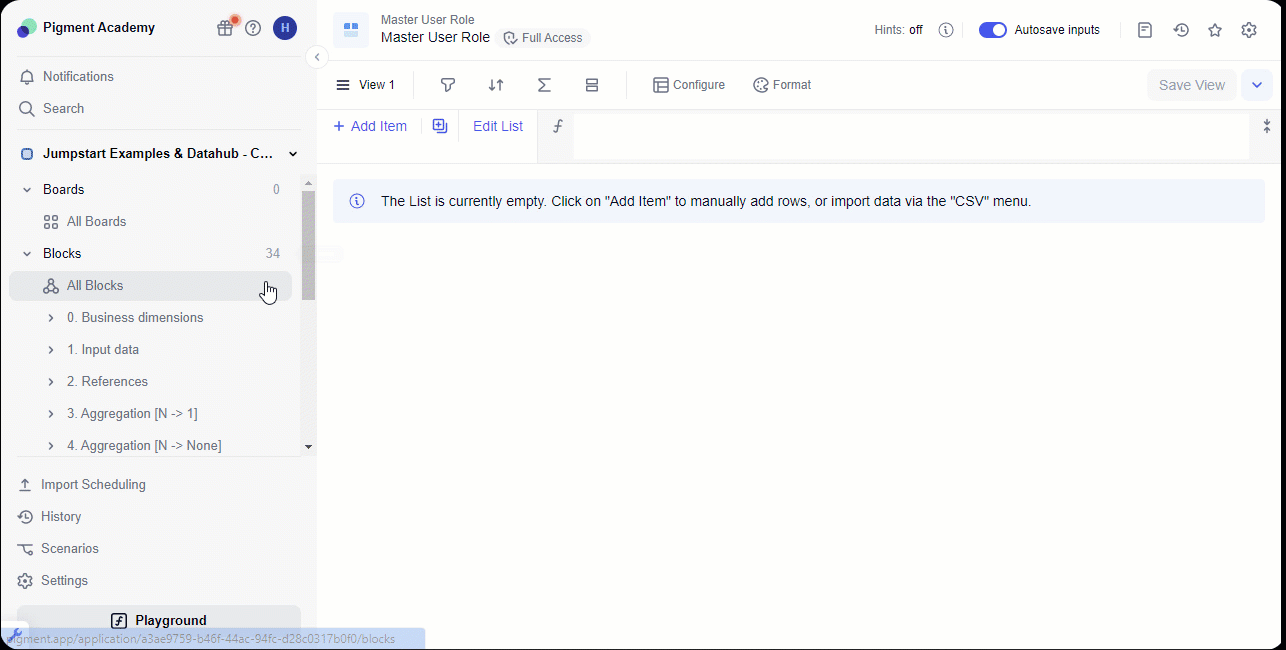
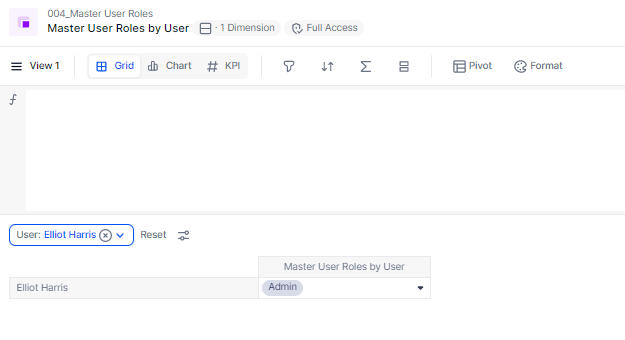
1. In the Master User Role folder of the Data Hub, create the Master User Roles by User:
-
Type Master User Roles by User for the Metric Name.
-
Select Dimension as the Data type and User as the Dimension.
-
Select Role as the Dimension(s) within this Metric.
-
Select Create.
-
This will be the Input metric where we assign Master User Role to a User.
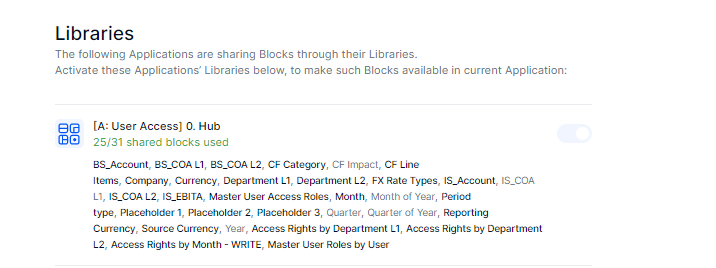
Give Target Applications Access to the Data Hub (if not done already)
-
Open the first target application. Select CTRL+K to search for the application by name using the Command Palette.
-
Select the application Settings.
-
Select Libraries.
-
Find the Data Hub and toggle the access to on.
5. Open the default ‘Role’ block in the Security folder.
6.Create an item for each action combination and different combination of Board Access.
Typically the default permissions for end users are:

NOTE: if the Boards default permission is ‘Can Open’, that role has access to ‘OPEN ALL BOARDS’ in the application.
6. In the Security folder, create a metric called “[App Name]: Master Role to App Role” dimensioned by Master User Role, which has the ‘Role’ format.
7. Share this block.

Accept Libraries from the Target Applications in the Data Hub
-
Open the Data Hub and accept libraries from the target application.
-
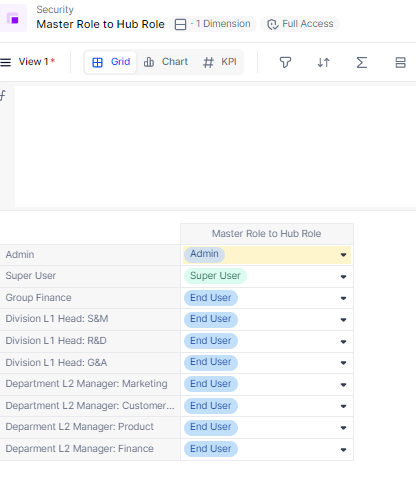
In the Security Folder, create the Master Role to Hub Role metric dimensioned by ‘Master User Role’ and formatted by the Data Hub ‘Role’ dimension..
Assign Permissions to the Target Applications
-
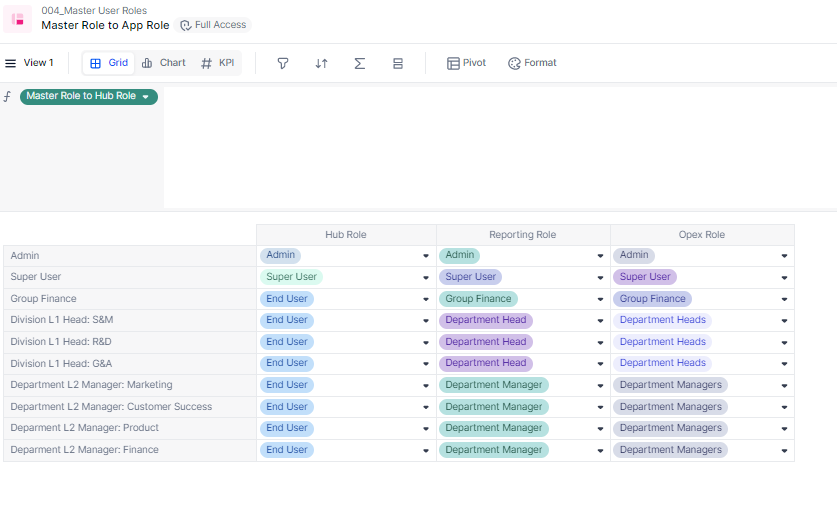
Create a Table called “Master User Role to App Role”. The metrics included in this table should be the metrics which map the Master User Role -> Local Application Role.
-
After you create the Table, map the Master User Roles to the Local Application Roles. This mapping will be used to assign the permissions and Board access for each of the Master User Roles.
-
In all target Applications, open the ‘User Roles’ metric and turn on the Manual Override.
-
Set yourself to Admin.
Add the following formula (adapt it to align the metric names):
'Reporting: Master Role to App Role'[by: 'Master User Roles by User']
This formula automatically calculates the Local Application Roles for users based on the mappings input into our Master User Role Table in the Data Hub. Input the manual override to avoid locking yourself out of your own application if you make a mistake with your formula. We input the Override, because without, if you make a mistake with your formula, you run the risk of locking yourself out of your own application
-
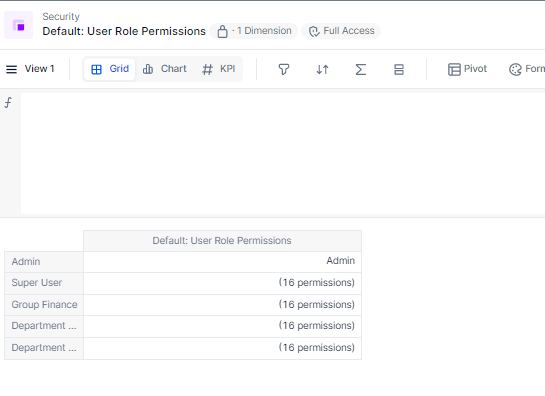
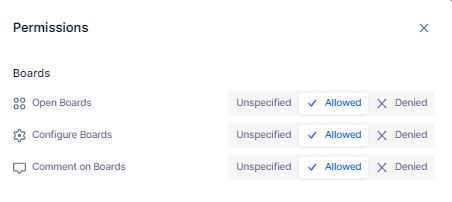
In the Target Applications, create the following metric which is dimensioned by Role and formatted with Permissions.
Set the appropriate permissions by Role, for end user Roles it would typically be having everything as Denied but ‘Display Application’, ‘Open Boards’ and ‘Comment to Boards’ should be Allowed: -
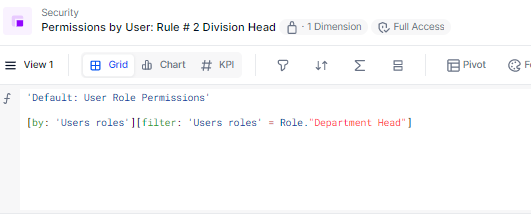
In target applications, create metrics to apply Board access. The Metrics should be dimensioned by User, and have the format of Permissions.
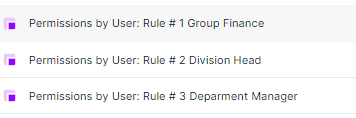
For each different combination of Board access, you would need one metric. In our example, Group Finance, Division Managers, and Department Managers all have their own Boards, so we would need to have 3 metrics.
Adapt the formula of the metrics to your own scenario:
Assign Access to Boards in the Application Security Settings
-
Now we have the permissions automatically calculated by User, all we need to do is apply the Board Access in Application Security settings.
In the Target Applications, open Settings -> Security. -
Scroll to the ‘Permissions’ Section.
-
Add the different Board access based on the metrics we created in the previous step.

Access Rights
We’ve now set up permissions, which allow / deny access to applications and boards in the hub and in the target applications - this grants users access to the relevant boards, but they can see all data in those boards. In our example, some roles will have partial access to the data itself (set at the Department or Division level). Let’s set this up!
In the Data Hub, we need to create metrics for Input of your Access Rights.
-
Consider all of the dimensions where you want to apply Access Rights within your workspace.
-
Consider which Dimensions are related through a hierarchy.
In our example, we have two dimensions where we want to apply AR, Divisions, which are a parent of Departments.
Create Boolean formatted metrics that are dimensioned by ‘Master User Role’ and the AR Dimension. We need two Boolean Metrics per dimension, one for READ and one for WRITE.

We’ll set up different read and write metrics as they’re easier to write and to maintain independently.

-
Consolidate the metrics into Tables to make inputs easier for Admins.

-
Since D2 Departments are children of D1 Divisions, we can use a formula to assign Inputs made at a D1 level, down to the D2 Departments. In other words, when we make inputs to a Division, all Departments in that Division also have the value.
-
In the child hierarchy (D2 Department in our example), turn Metric Override ON. This will allow us to make inputs for a Master User Role at either a D1 Division Level or a D2 Department Level.

-
Create additional metrics that convert the Boolean formatted metrics into metrics which we can use to apply AR to Applications.
Dimension these metrics by User and the AR dimension with a data type format of Access Rights. Share these blocks.
-
Adapt the formula for metrics to your own scenario, along with referencing the appropriate metrics):


The formula assigns the appropriate access rights based on the inputs we made into the Boolean formatted metrics. Since we input AR at a Master User Role level, we need to do a BY, to look up each user’s Master User Role. It’s important to assign accessrights(False, False), as the default position (in the Role) metric if users have READ access to everything. So if we are restricting access to certain items, then it needs to be False (rather than Blank). Finally we ‘EXCLUDE’ Admins because they have full access everywhere. This prevents any Admin access issues.
-
In the Target Applications, create metrics that have identical structure to the Access Rights metrics in the Data Hub in the Security folder..

-
The formula for each of the metrics in the previous step should simply reference the original metric within the Data Hub.
-
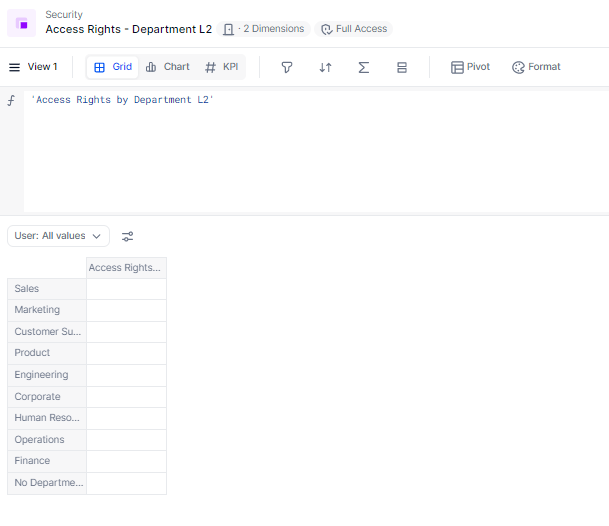
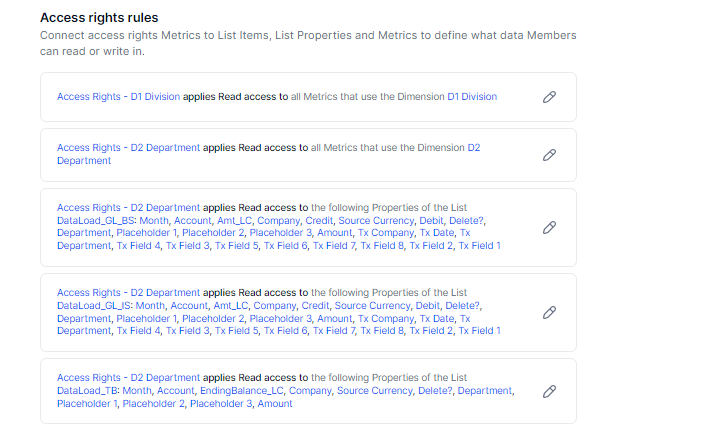
To apply the AR rules to the appropriate structures within your model as a final step,open Settings -> Security. We scroll to the Access Rights section, and we create our Rules. In our example, we have 3 Transaction lists where we apply Department L2. We then apply Division L1 and Department L2 Rules to all blocks with those dimensions.
Streamline Maintenance with Admin: User Access Boards
Now we have created the functionality, we need to create Admin Boards within the Data Hub to ensure clear and easy maintenance of user access. In our example, we have the following:
-
‘Manage Users’ Board: Where we assign user a ‘Master User Role’ once they are added to the Workspace
-
‘Manage Master User Roles’ Board: Where we create ‘Master User Roles’ and manage their mappings to Local Application roles.
-
‘Manage Access Rights’ Board: Where we assign AR by ‘Master User Roles’
-
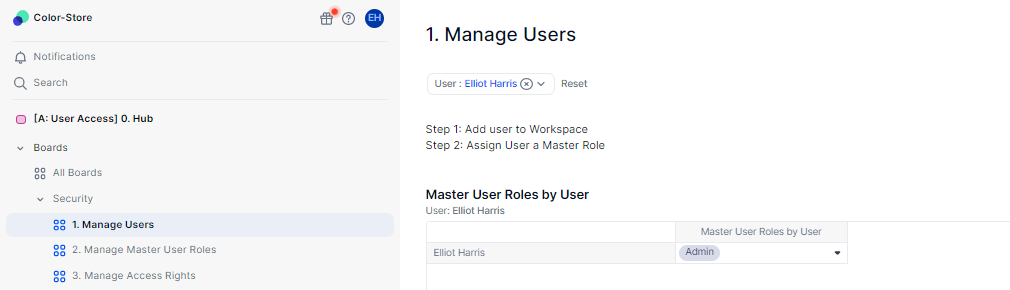
‘Manage Users’ Board:
This Board should simply contain ‘Master User Roles by User’ metric. This is the Board where Admins would assign Master User Roles to new users. This is the only thing that is required when adding a new user, as long as there is a Master User Role setup that already covers the scope of that user.
-
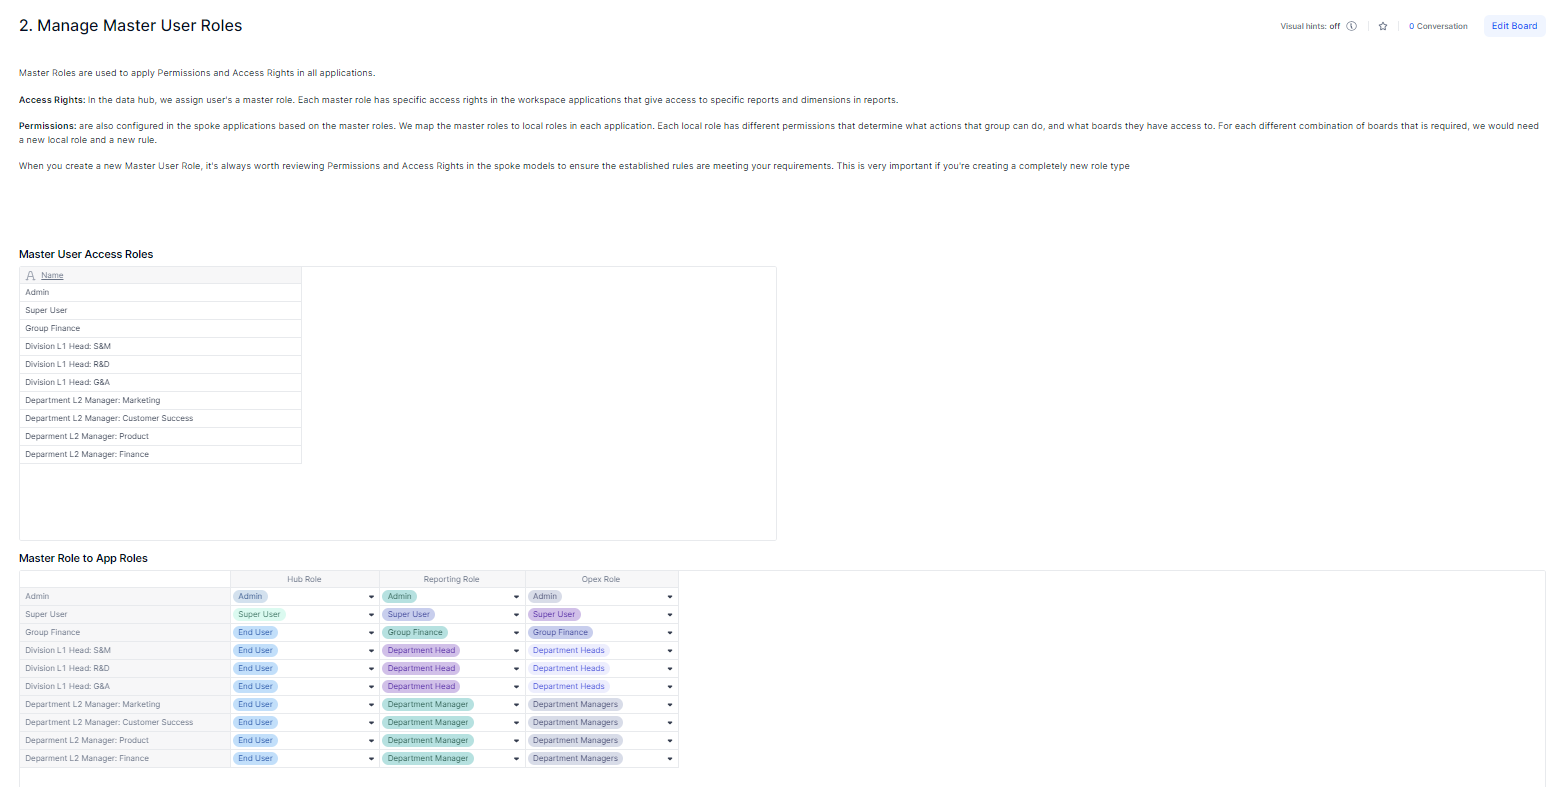
‘Manage Master User Roles’ Board:
This Board should contain the Master User Role Dimension, and the Table where we map the Master User Roles to Local Application Roles.
-
‘Manage Access Rights’ Board:
This Board should contain the different AR Input tables.

Precautions when working on user management
Correct user management settings is a critical part of your Application. Whenever you create a new rule, or modify one, you must ALWAYS TEST with a TEST user having the SAME ROLE and AR as your target users.
An acceptable test means going over EVERY BOARD in EVERY Application the user has access to.
Additional Reading:
-
Setting Up Security: Access rights & Permissions, the Practical Guide
-
Inheritance of Access Rights and how to use RESETACCESSRIGHTS