Solved

Adjusting fields in an automatic import (tips and pitfalls)

  • 5 June 2023
  • 5 replies
  • 102 views

Badge

Hello Pigment Community,

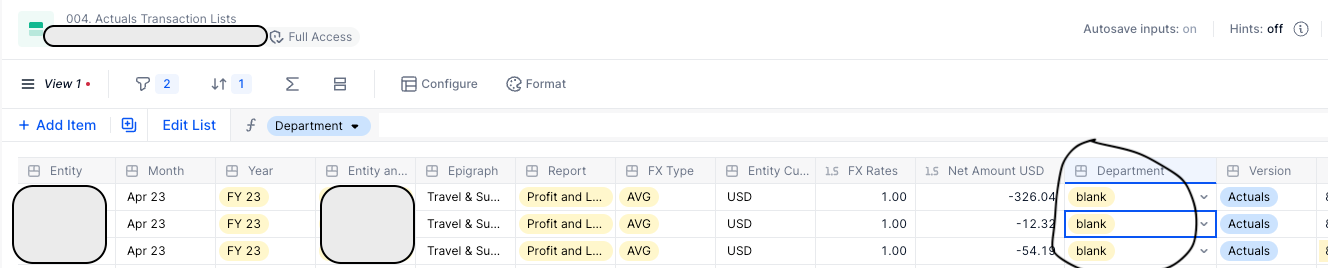
We have an automatic import set up connecting Pigment to our accounts in Xero. See below screenshots for a visual.

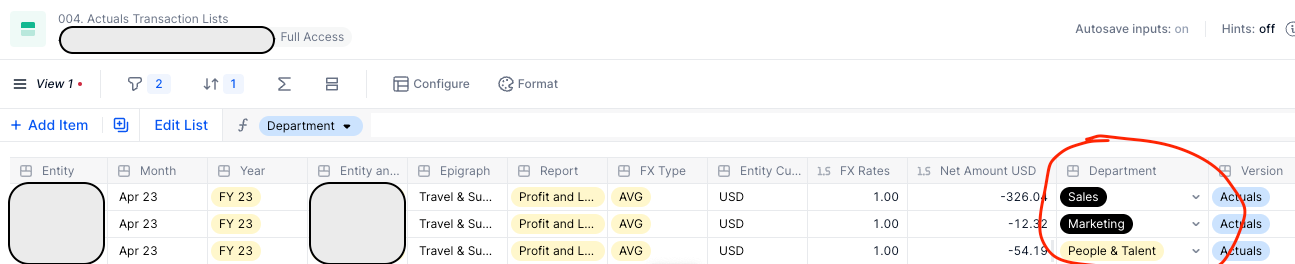
For one of our legal entities, we do not have the “Department” field set up in Xero, but we need it in Pigment. As such, I’ll need to assign a “Department” to each transaction line of the import. As you can see by the screenshots, currently the departments are automatically being set to “blank”.

For my purposes, I think the quickest way to achieve the department assignation would be to go line by line in my import and manually assign a “Department”. This entity is being phased out, so this is a one time clean up job, so happy to do (a bit of) manual work in assigning the departments as opposed to setting up a more permanent mapping logic.

My questions/concerns:

  • If I spend the time to do this, will future instances of the data import “wipe” these manual assignations I’ve made?
  • To encapsulate my question, is there any tips & tricks, or maybe any pitfalls, I should avoid when making updates directly in the imports?

Thanks,

Gab

Daily Import Scheduling
Current state: department field is blank (no departments in Xero)
Future state: Need to “map” each line to a department


icon

Best answer by francois 16 June 2023, 15:56

View original

5 replies

Userlevel 6
Badge +14

Hi Gab, 

This depends entirely on how your import is set up. Two things to look for:

  • if you have a unique identifier on one of your properties (you can check by looking whether any property is underlined, but I don’t see any in your screenshot) this means any data in the new import file will update the lines that are already present in the transaction
  • if you have enabled Delete existing items in the second step, depending on the context. If you have enabled a scoped import, only lines that match with the context will be updated
The option to delete existing items, at the end of the step 2 of the import

If none of these options have been enabled, this means that any line found in your import will be added as a new one, and the existing lines won’t change so you’re free to set them manually.


You can check your import configuration by first downloading the source for import using the audit trail - click Block updates at the top right, then open the import summary and download the file.

After this, you can click on import > Start from an existing configuration, import the source file and explore the set-up. Just don’t click on the blue Import button and no data will be imported again.


Hope this helps, let me know if there’s anything I can clarify.

Badge

Thanks so much for the quick response François, much appreciated. Having looked into it, it looks to me like we delete and re-upload every day. Does my screenshot confirm that? Makes sense since it is accounting data, and any retrospective adjustments would need to be factored in.

If that’s the case, can you think of any other ways to achieve a one-time categorisation of this data, given that my upload would delete my categorisation every day should I update it directly in the import.

My thoughts:

I could probably use a unique identifier (journal ID, see below screenshot), map it to a department elsewhere in a block in Pigment, and then set up a rule in my import to apply X journal ID to Y department according to my “mapping table”.

Easier said then done for me. Any practical steps you can provide to help me achieve this?

Thanks,

Gab


Badge

Hi @francois - just following up on this thread with some new information. I’ve decided to proceed with a mapping logic that connects a new Dimension list I’ve created to my import using “Account Name”, in order to assign a “Department” to each line of the transaction list.

Screenshot 1 - I’ve assigned ‘Account Names’ to a certain Department (my mapping logic)

Screenshot 2 - (Note: ‘Account Name’ isn’t feature in the screenshot, but the transaction list uses the same ‘Account Names’ as screenshot 1) In the circled “Department” column, I need a formula that says, if the Account Name in screenshot 1 matches the Account Name in the transaction list in screenshot 2, assign the Department per screenshot 1.

I’ve tried all kinds of IF and IFBLANK formulas, with no luck. I don’t think this should be overly complicated, I think I might just be missing something obvious.

If you could suggest a couple of formula syntaxes, that would be much appreciated!

Gab


Badge

Hi @francois , this task is blocking me quite a bit, so any advice would be much appreciated.

I think an IF formula would work well, but I think the issue comes down to how my dimensions are set up. No matter what formulas I try, I get the below error message.

Do I need some sort of modifier in my formula? Is there something fundamentally wrong between the compatibility of my transaction list and newly created dimension?

Thanks in advance,

Gab


Userlevel 6
Badge +14

I think there’s a single source for Departments, based off the Account Name right? I don’t see how / why you’d use an IF condition here - maybe you just need simple property chaining.


Have you tried something like Transaction.AccountName.Department, where Transaction.AccountName is the property of dimension AccountName in your transaction (missing as stated in your Screenshot 2), and Department is the property visible in Screenshot 1. Effectively, you’re pulling the Department of the AccountName of your Transaction item (that’s one way to read the formula).


Alternatively, your intuition of using the Journal ID to update rather than replace your transaction items is also right. In that case, you should use a property of your transaction that is not updated in the import, so that when updating the value, it does not erase your input. 

In that case, you could also use IFBLANK, with the different sources that are available, e.g. IFBLANK(IFBLANK(Transaction.'Manual Department', Transaction.AccountName.Department), Transaction.Department) where Manual Department is the property you set manually, that only holds values you set by hand, Transaction.AccountName.Department is the default value based off the AccountName and Transaction.Department is the blank that is imported by default.


Hope this helps!

Reply