


This article explains how to connect QuickBooks with Pigment to import your data into a Pigment block.
Table of Contents
Setting up the QuickBooks Connector in Pigment
From the Workspace homepage, navigate to Settings → Integrations and click on + Add next to the QuickBooks integration.
Important note
You need to be a Pigment Workspace Admin to configure the connector.
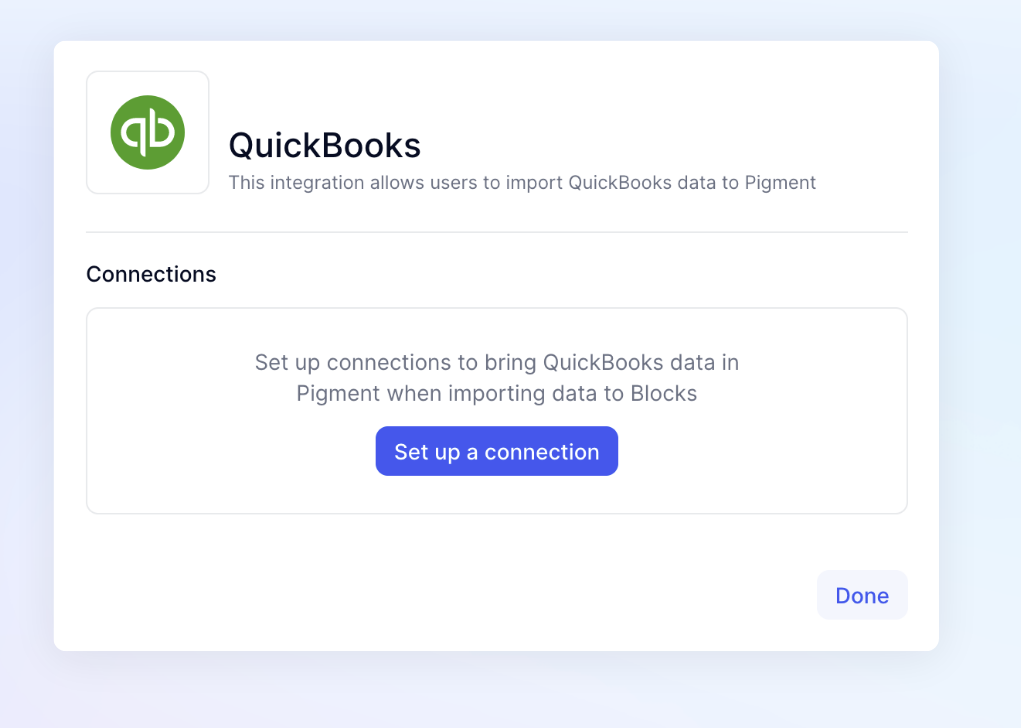
Click Setup a Connection and then fill in the following 2 fields. These fields will remain editable if you need to add additional applications or rename.
- Name: give a name to your connection (ex: “QuickBooks connection”)
- Application Access: list of applications that will be allowed to use this connection
Then click Connect and login through the QuickBooks window that opened - this authentication will be used by Pigment to be able to connect to QuickBooks.
Please ensure pop-up blocker is disabled.
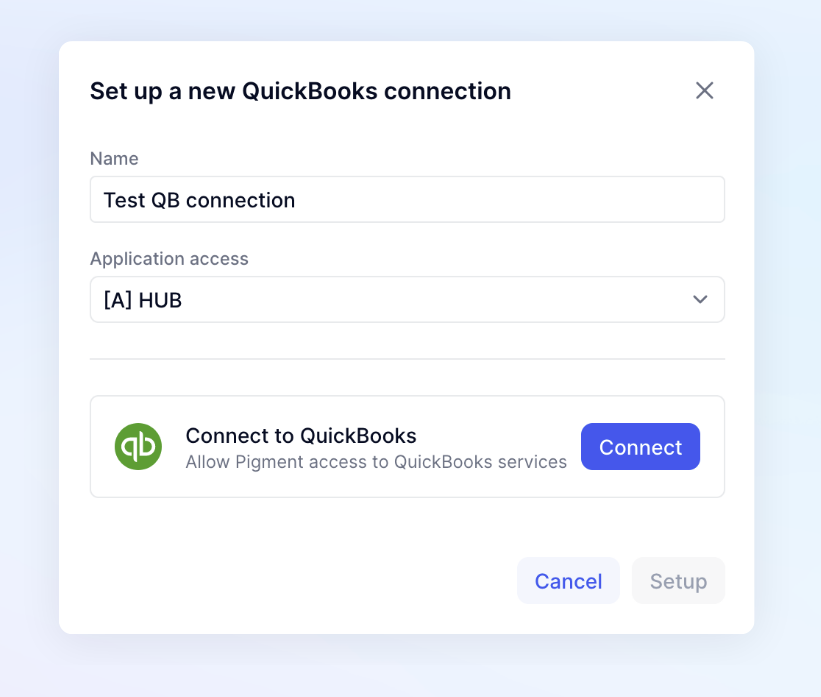
Click on Setup to finish!
Load QuickBooks data into Pigment
Once the QuickBooks Connection is configured, navigate to an Application where the connection is available.
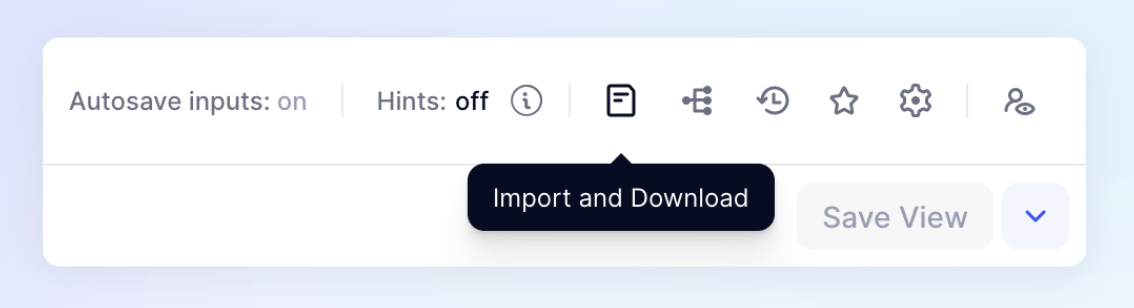
From there click “Import Data” for the object you want to import data into.
For example, if you were importing into a Transaction List, you would open up the list, then select Import and Download and then Import data.
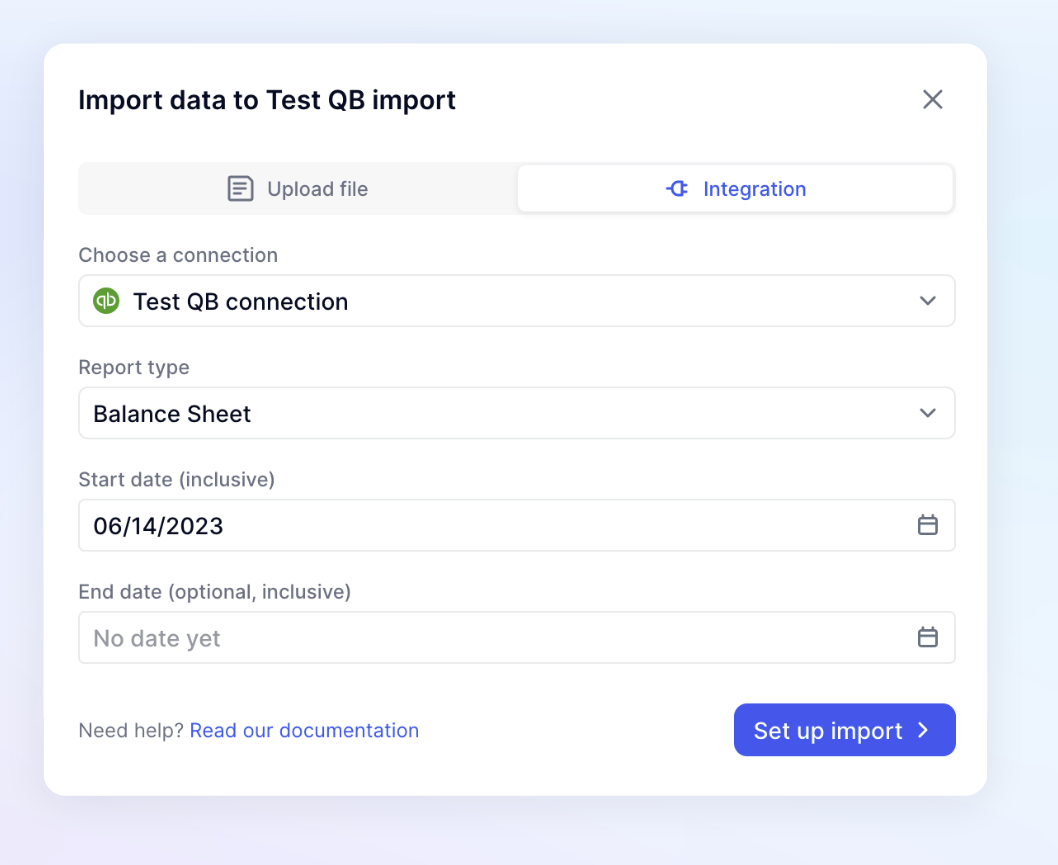
Click on the Integration tab and select the previously configured QuickBooks Connection from the dropdown. Select a report type and customize the time window.
Note that the dates are inclusive, meaning that they will both be taken into account in the boundaries of the import window. For example, the import will be from start date to end date and both will be included. The end date is optional and if not specified will be set to today meaning the date of import.
If you do not see the QuickBooks connection you have configured, make sure the current application is listed under the authorized applications for this connection. To fix this, go back to the setting’s Integrations page, and check that the Application is on the Application Access list.