Image URLs can be entered into text formatted Metrics and List properties and be displayed as images that get larger when you place your mouse on them. This article discusses the steps necessary to get images displayed in grids.
Table of Contents
All Image URLs used in Metrics or List properties must come from a domain that is approved by a Security admin. Learn more about Approved domains for images.
Use cases for images in Metrics and Lists
Images in grids can be a powerful addition to your Boards. They can be used to put a face to an employee or to add an image to a SKU making it easier to identify. You can use a formula to create or reference your image URL.
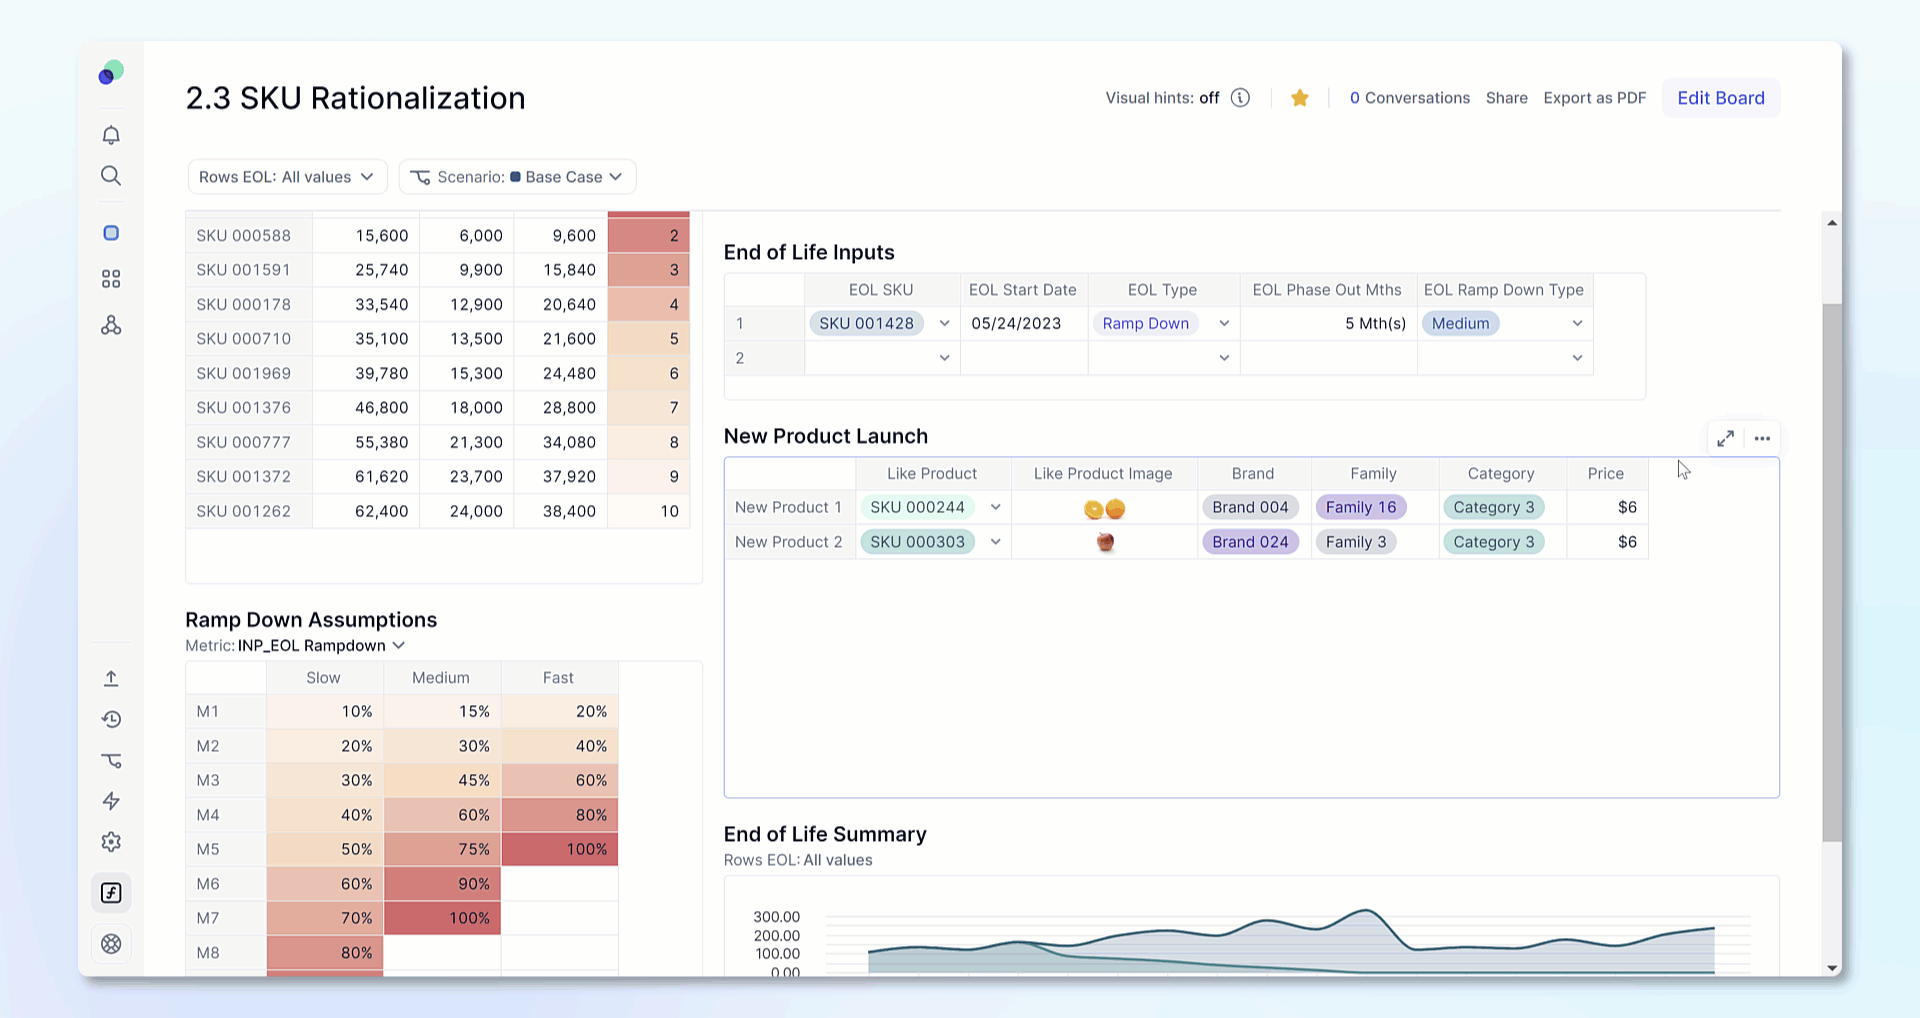
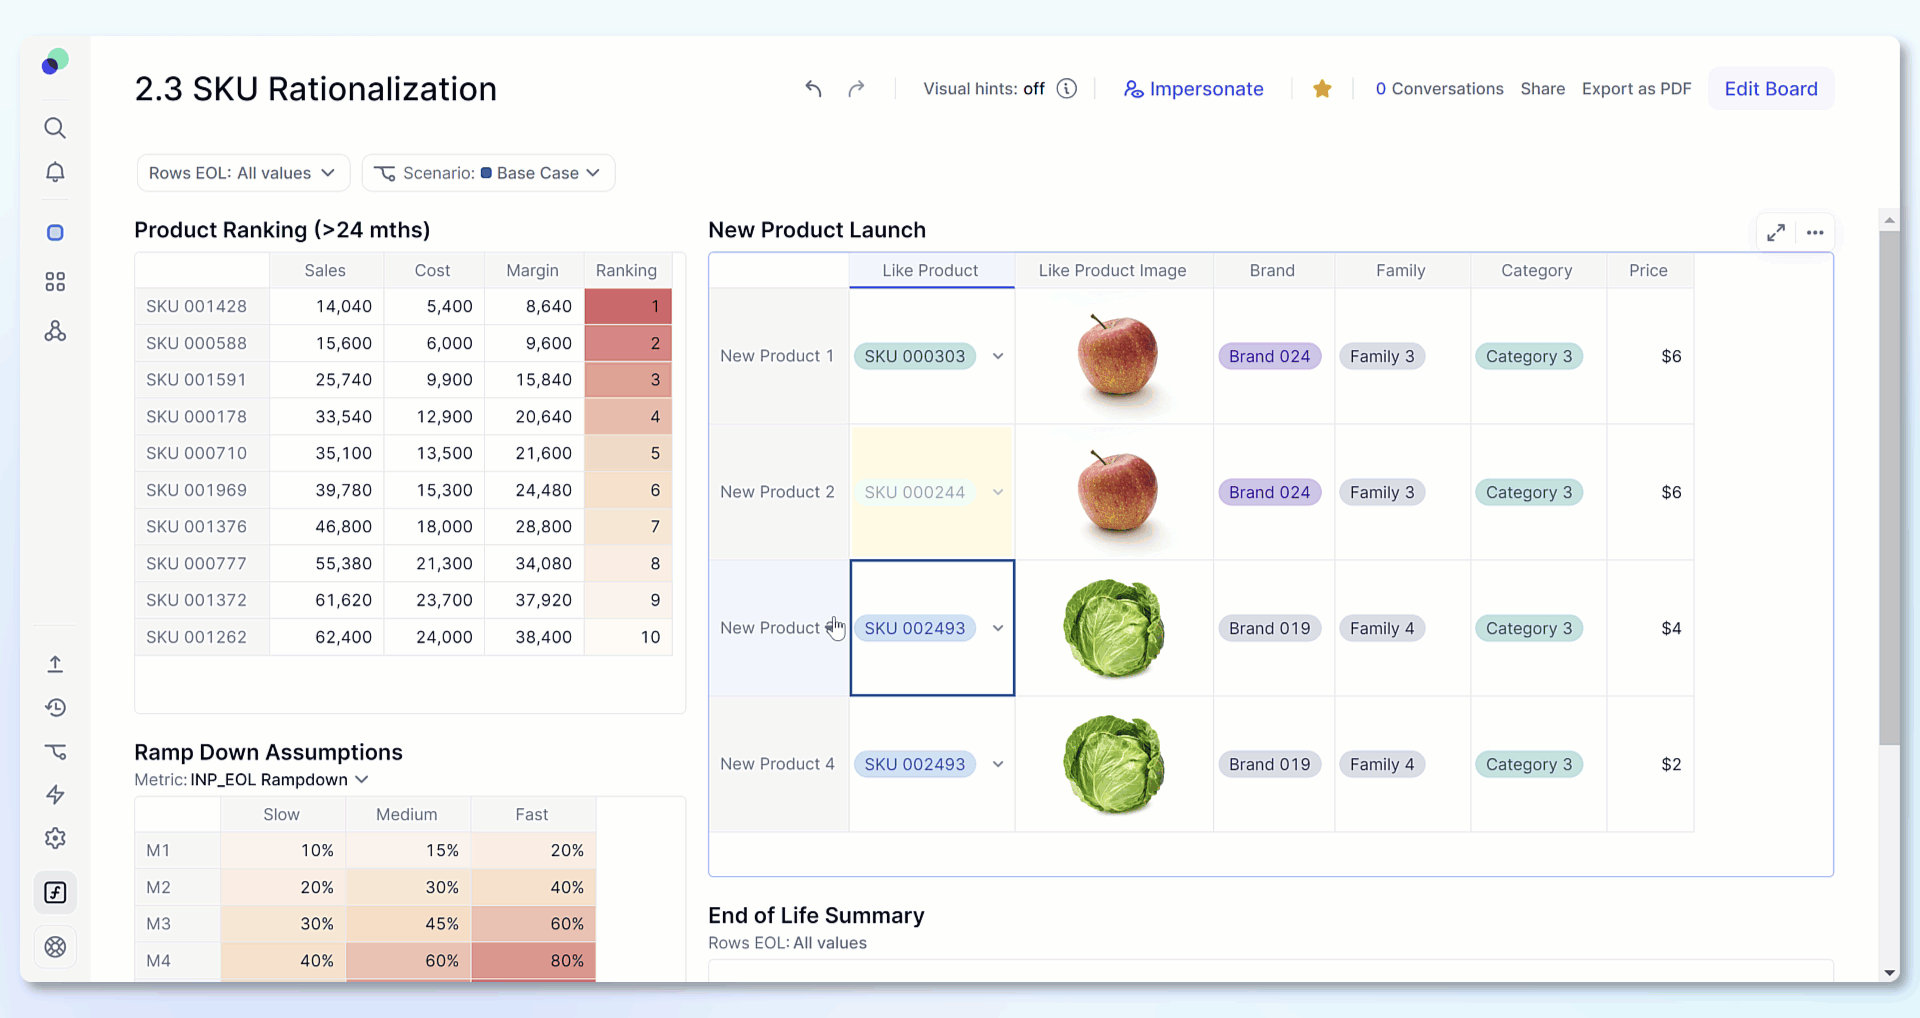
Here is an example on a Board launching a new product. The Image URL was added to the SKU list and referencing in a formula when the Member selects a “Like product”.
How do I set up an Image in a Metric or List property?
The steps to get an image into a Text formatted Metric or List property can be done in any order. They involve getting an image URL, having the domain from that URL approved for your workspace, then placing that URL in a Metric or List property with a Text data type, formatted to display as an image. While the order of the steps don’t matter all must be done before an image appears.
Step 1: Get an Image URL
1. Open your preferred web browser and navigate to the website that contains the image you want to get the address of.
2. Right-click on the image. A context menu will appear.
3. Look for an option that says Copy Image Address, Copy Image URL, or something similar. The exact wording may vary depending on the browser you are using. Click on this option.
4. The image address is now copied to your clipboard. You can paste it anywhere you need to by pressing Ctrl+V (or Command+V on a Mac).
Step 2. Set Data type to Text and Display as Image
Images work in both List properties and Metrics. The steps are slightly different to set this up.
While it is possible to highlight individual cells and right click to format and adjust through Text display, we recommend establishing image rendering as the default following the steps below.
Display text as an Image in Metrics
When creating a new Metric, set the Data type to Text. Once you select the data type of Text, you will see the options of Text Display, select Image.
If your Metric is already created, open the Metric and click on the cog wheel in the top right to open Metrics settings. Navigate to the Default formatting section and under Text Display click Image.
The Metric setting of Default formatting is only available in when the Data type is set to Text. If you do not see this option, check the Data type in the Structure setting.
Display text as an Image in Lists
When creating a new List property, set the Data type to Text. Once you select the data type of Text, you will see the options of Text Display, select Image.
If your List property is already created, open the List and right click on the property, select Edit property. Once the property data type is set to Text, you’ll see Text Display, select Image.
Step 3. Place URL into Metrics or List properties
URLs can be manually entered, imported, created or referenced using a formula.
If an image comes from a domain that is not approved the image will not display. Depending on your account type, you will receive one of two messages.
If you are not a security admin, you will see Image cannot be displayed, contact your Security Admin for more information once a Security Admin approves the domain the image will appear.
If you are a security admin, you will see Image URL is not approved. Approve domains , click approved domains and follow the steps to approve the domain for the URL.
To edit a URL after it is displayed as an image, double click on the image you wish to adjust. You do not need to adjust the way the text is displayed.
How to approve an Image URL Domain
Members must have an Account type of Security Admin or Primary owner to add to Approved Domains. If you are not a Security admin, you will not see the Colo & Images section. For Workspace admins it will appear as just Colors.
1. Identify the domain from the URL.
For example, if the URL is https://www.example.com/path/image.jpg, the domain is www.example.com.
2. Click on the Settings option in the sidebar.
3. Click on Color & Images.
4. Under Image settings in the “Approve domains to display images in Views” section click the + Add domain button.
5. In the popup enter the domain URL.
6. Click the Add Domain button.
Tip: Adjust the layout size for images to appear larger
You can adjust the row height of a grid for image to appear larger in a Grid. From your Block, select the Layout menu button. Under layout, you’ll see the option to adjust Row height. We recommend XL for images that will be placed on a Board.