


Pigment Automations use Metrics to set conditions that trigger either a notification or a task to defined Members. This article talks about using the Automations feature, and how it streamlines your work in Pigment.
Table of Contents
Check out the Pigment Automations overview video in the Academy!
What is a Pigment Automation?
Automations allow members to define conditions through Metrics that trigger notifications or tasks to other Members. Pigment automated notifications and tasks improve operational efficiency and decision making processes. You can instantly alert stakeholders to time-sensitive developments, as well as proactively actioning completion of activities within your team, department, or organization.
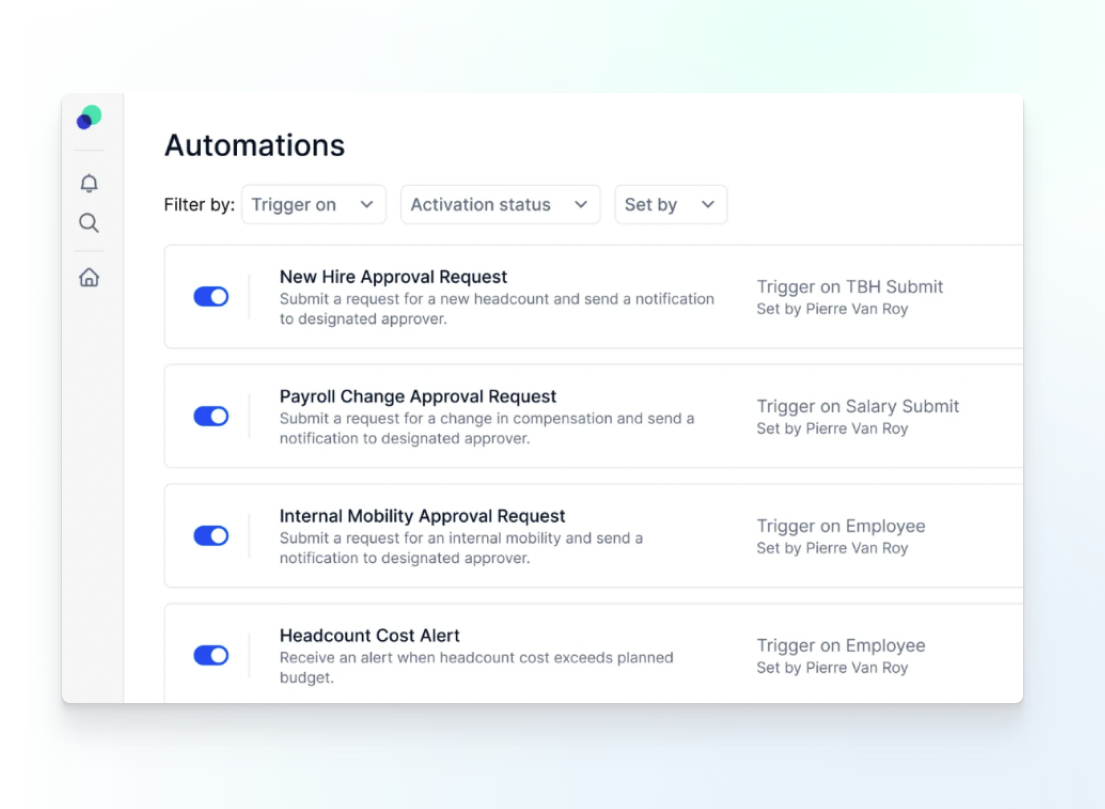
Automations work by defining a trigger based on any Metric and also defining a corresponding action. The trigger defines the exact value and conditions that must be met in order to send the action. Depending on your requirements, the action does one of the following:
- Defines which members receive a notification and the notification contents. For more information, see Set Up a Pigment Automated Notification.
- Defines the task assignees, due date, due time, and task contents. For more information, see Set Up a Pigment Automated Task.
For Enterprise customers, automated actions take productivity a step further with Pigment workflows. In Automations you can create a series of up to 10 linked actions to create a complex workflow for defined Members. For more information, see Set Up a Pigment Workflow.
Pigment Automation Use Cases
There are generally two categories where Pigment automations are used:
- Monitoring automations. Alerts or notifications when metrics achieve a certain value so you can proactively analyze, investigate, and act on the information.
- Collaboration automations. Creating tasks requiring approval and validation, making it easier and more efficient to work together in Pigment.
Here are some ideas for your first Pigment automations using both monitoring and collaboration categories. In these ideas we combine notifications, tasks, and workflows.
Workforce Planning
- Monitoring:
- Notify the finance and department leads if the headcount cost exceeds the budget so that To-Be-Hired positions can be reassessed and prioritized proactively.
- Collaboration:
- When a new headcount request is submitted, create a task for the HR team to approve it.
- When HR has completed the task, create a task within a workflow for the finance team to approve the headcount request.
- When this task is marked as done, the next step is to send a notification to the person responsible for the headcount request. Let them know that the request process is complete and went smoothly!
Financial Planning and Analysis
- Monitoring:
- If a budget variance metric is outside the acceptable range, notify the person who needs to take action so they can do so proactively.
- Collaboration:
- When your department leads submit their budget for review, create a task for the relevant finance team members to review and approve.
- When the budget has been approved, include a notification in your workflow to notify the department lead that the approval process is complete.
Sales Performance Management
- Monitoring:
- Signal that a threshold value is reached, such as a quota or sales target, to the relevant stakeholders.
- Collaboration:
- When your sales team lead submits the incentive compensation plan for approval, create a task for the appropriate members in the executive team to approve it.
- When the incentive compensation plan has been approved, include a notification in your workflow to notify the sales team lead that the approval process is complete.
What are Automations for?
Automations can be customized to your individual use case. Some common use cases are starting a new workflow, alerting a member when a threshold is reached, creating a task to request for Members approval, and creating corresponding tasks for further action.
Depending on a user’s notification settings, they’ll also receive an email or Slack message from the notification.